
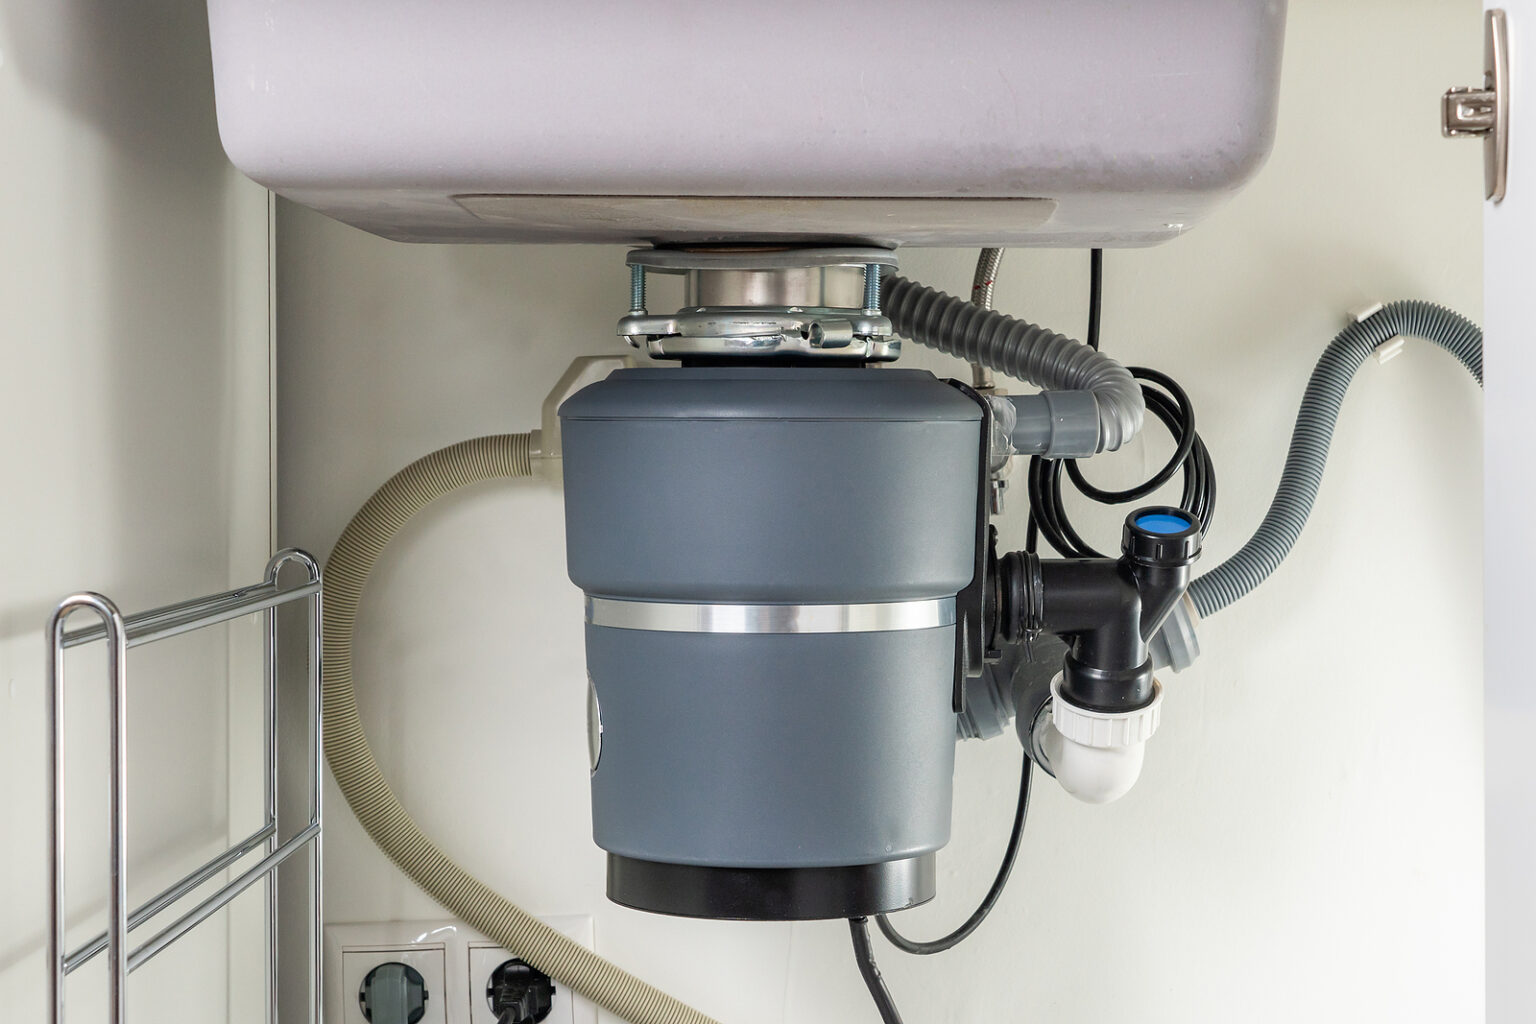
Garbage disposal parts work together to grind food scraps, control water flow, connect the appliance to the sink, prevent leaks, reduce noise, and protect the motor from damage. Although a disposal appears to be one compact appliance, it contains several mounting, plumbing, mechanical, and electrical components.
Understanding these components helps you diagnose problems correctly. Water leaking around the sink opening, for example, requires a different repair from water dripping near the discharge pipe. Likewise, a disposal that hums but does not grind has a different likely cause from one that remains completely silent.
Some external components, including splash guards, stoppers, mounting gaskets, drain elbows, air-switch buttons, and approved power cords, may be replaceable. However, a cracked housing, failed motor, worn internal bearings, or severe corrosion usually makes complete disposal replacement more practical.
This guide explains the names and functions of the major components, the symptoms they produce when damaged, how to select compatible replacements, and when professional help is the safer choice.
How a Garbage Disposal Works
A standard residential garbage disposal does not work like a blender. It does not use sharp, rotating knife blades to chop food. Instead, an electric motor rotates a metal plate inside the grinding chamber.
Movable metal impellers, sometimes called lugs, sit on that spinning plate. Centrifugal force pushes food outward, while the impellers force it against a stationary grind ring. The grind ring breaks the material into small particles. Running water then carries those particles through the ring, out of the appliance, and into the drainpipe.
The basic process follows these stages:
- Food enters through the sink opening.
- A splash guard helps contain food particles and water.
- The motor rotates the grinding plate.
- Impellers move food toward the grind ring.
- The grind ring breaks the food into smaller particles.
- Water carries the particles through the discharge outlet.
- The drainpipe moves the waste toward the P-trap and household drainage system.
This distinction is important because advice about sharpening or replacing disposal “blades” is usually misleading. Most standard household disposals use impellers and a grind ring rather than sharp blades.
Main Garbage Disposal Components at a Glance
| Component | Main function | Common problem |
| Sink flange | Connects the disposal mount to the sink opening | Leak around the sink drain |
| Flange seal or putty | Creates a watertight seal | Dried, cracked, or poorly installed seal |
| Backup flange | Supports the mount beneath the sink | Uneven or loose installation |
| Mounting ring | Locks the disposal to the sink assembly | Vibration or sagging |
| Retaining ring | Holds mounting components together | Mount will not remain secure |
| Mounting gasket | Seals and cushions the connection | Leak or excessive vibration |
| Splash guard | Limits water and food splashback | Cracks, odor, or excessive splashing |
| Sound baffle | Helps reduce operating noise | Disposal becomes noticeably louder |
| Stopper | Closes the sink opening | Sink will not hold water |
| Grinding chamber | Contains food during operation | Corrosion or housing leak |
| Turntable | Rotates the grinding mechanism | Humming without movement |
| Impellers | Push food toward the grind ring | Sticking or poor grinding |
| Grind ring | Breaks food into fine particles | Slow grinding or internal damage |
| Motor | Powers the turntable | Humming, overheating, or no operation |
| Reset button | Restores power after an overload | Repeated tripping |
| Unjamming socket | Allows manual movement of the turntable | Jam remains locked |
| Dishwasher inlet | Receives dishwasher drain water | Leak or poor dishwasher drainage |
| Knockout plug | Seals an unused dishwasher inlet | Blocks drainage if not removed |
| Discharge elbow | Connects the disposal to the drain | Side leak |
| Discharge gasket | Seals the outlet connection | Water escapes while draining |
| Power cord | Supplies grounded electricity | Fraying or intermittent power |
| Wall or air switch | Controls operation | Disposal does not start |
| Motor housing | Protects the motor and wiring | Internal leak or structural damage |
Sink Flange
The sink flange is the visible ring surrounding the disposal opening. It passes through the sink’s drain hole and forms the upper part of the mounting assembly.
Flanges are available in stainless steel, chrome, black, bronze, white, and other finishes. However, finish is only a cosmetic factor. The flange must also match the sink opening, sink thickness, mounting system, and disposal model.
A flange that fits through the sink opening may still be incompatible with the mounting assembly below it. Some manufacturers use proprietary locking systems, so a similar-looking flange from another brand may not work.
Water appearing around the sink opening can indicate:
- Failed plumber’s putty or sealant
- A damaged upper gasket
- A loose mounting assembly
- An incorrectly installed flange
- A cracked or damaged sink surface
Before replacing the flange, dry the area and confirm that the water actually begins at the sink opening rather than traveling down from another connection.
Standard and Extended Sink Flanges
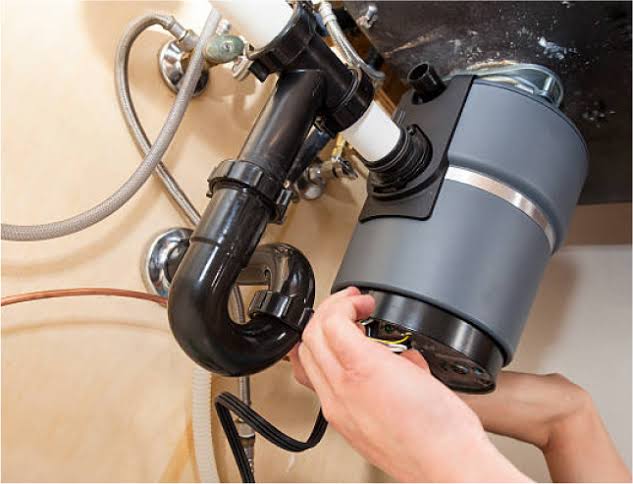
A standard flange works with most conventional stainless-steel kitchen sinks. Thicker fireclay, stone, cast-iron, composite, or specialty sinks may require an extended flange.
An extended flange provides additional length beneath the sink so the mounting components can engage securely. However, sink thickness alone does not guarantee compatibility. The flange must still match the disposal’s mount.
Measure the sink at the drain opening and compare that measurement with the disposal manufacturer’s instructions. An extended flange cannot repair a cracked mounting assembly or an incorrect sink-hole diameter.
Flange Sealant and Upper Gaskets
The sink flange requires a watertight seal. Depending on the sink material and manufacturer instructions, the installation may use plumber’s putty, a rubber gasket, silicone, or another approved sealing material.
Plumber’s putty is not appropriate for every sink. Certain porous stone, plastic, or composite materials may stain or react poorly with oil-based putty. Always follow the requirements of both the sink and disposal manufacturers.
Applying extra sealant without locating the leak may temporarily hide the problem while allowing water to continue damaging the cabinet or electrical components.
Backup Flange
The backup flange sits beneath the sink and helps support the disposal’s weight. It also distributes pressure around the drain opening.
If the backup flange is bent, reversed, or unevenly installed, the disposal may hang at an angle. This can cause vibration, poor drain alignment, or leakage around the sink flange.
A secure installation requires all mounting components to be assembled in the correct order.
Mounting Ring
The mounting ring locks the disposal body to the sink assembly. Depending on the brand, it may use screws, locking tabs, ramps, clamps, or a twisting mechanism.
Some manufacturers use proprietary mounting systems. InSinkErator’s Quick Lock design is one example. Therefore, a mounting ring designed for one product family should not automatically be used with a different brand or mounting style.
The disposal should remain level and firmly connected after the ring is locked. A loose mounting ring can create vibration, noise, drainage stress, and leakage.
Retaining Ring or Snap Ring
A retaining ring fits into a groove and holds parts of the mounting assembly together. Although it is small, it performs an important structural function.
A damaged, bent, or incorrectly seated retaining ring can prevent the disposal from locking securely. It should not be replaced with an ordinary hardware-store ring unless the dimensions and manufacturer specification match exactly.
Mounting Gasket
A mounting gasket helps create a seal between the disposal and mounting assembly. It may also cushion vibration and reduce operating noise.
Retail plumbing catalogs list standard and deluxe mounting gaskets, but these terms do not mean that the parts fit every disposal. F.W. Webb, for example, identifies the InSinkErator SMG-00 gasket as compatible with specific InSinkErator product families rather than all brands.
A replacement gasket must match:
- The disposal brand
- The exact model or product family
- The mounting-system design
- The required diameter
- The gasket profile and thickness
Replacing the mounting gasket may solve a leak near the top of the disposal. It will not repair a cracked housing, leaking dishwasher connection, or failed discharge gasket.
Splash Guard
The splash guard is the flexible rubber insert visible inside the sink opening. It limits the amount of food debris and water that can splash upward while the disposal runs.
Food residue often collects beneath the folds of the guard. Over time, the part may become stiff, torn, curled, stained, or unpleasant-smelling.
Some splash guards lift out from above the sink. Others are built into the mounting gasket and require the disposal to be lowered before replacement.
Check the mounting method and disposal model before ordering. A guard may look correct but still have the wrong diameter or attachment design.
Sound Baffle
A sound baffle resembles a splash guard but also helps reduce operating noise. Some disposal models have removable sound baffles, while others combine sound reduction with the mounting assembly and outer insulation.
F.W. Webb lists a removable baffle specifically for compatible InSinkErator Badger disposals, illustrating that baffles may be product-family specific.
Replacing a missing or hardened baffle may reduce ordinary noise. However, it will not correct worn bearings, loose mounting hardware, a trapped metal object, or internal mechanical damage.
Stopper and Strainer
A stopper closes the sink opening so the basin can hold water. It is usually one of the easiest accessories to replace.
A strainer helps prevent utensils, bottle caps, bones, and other large objects from falling into the grinding chamber. It can also catch food pieces when the disposal is not operating.
Some batch-feed disposals use a special stopper to activate the appliance. That stopper is not merely a drain plug. A standard sink stopper may fit the opening but fail to engage the activation mechanism.
Continuous-Feed and Batch-Feed Controls
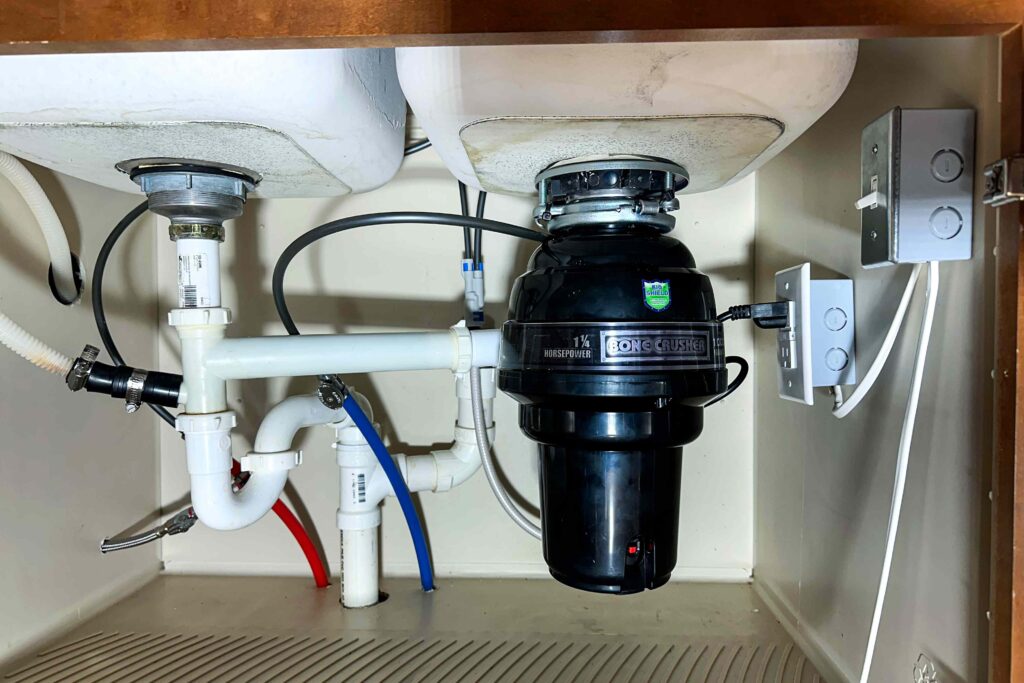
A continuous-feed disposal operates while a wall or air switch remains activated. Food can be fed into the chamber while the motor is running.
A batch-feed model requires food to be placed inside first. A special stopper or cover then activates the disposal. This design may use a magnetic, mechanical, or internal switching system.
When a batch-feed disposal has power but will not start, the problem may involve the operating stopper or internal activation switch rather than the motor.
Grinding Chamber or Hopper
The grinding chamber receives food from the sink and surrounds the turntable, impellers, and grind ring.
Manufacturers may construct the chamber from stainless steel, galvanized metal, reinforced polymer, or a combination of materials.
Internal corrosion or a structural crack can cause water to leak through the disposal body. Since most residential disposals are sealed appliances, repairing a cracked chamber is usually not practical.
A leak from the main housing typically requires complete disposal replacement.
Turntable or Spinning Plate
The turntable is the motor-driven plate at the bottom of the grinding chamber. When the disposal operates, this plate rotates and moves the impellers.
A spoon, metal cap, bone fragment, piece of glass, or other foreign object can block the turntable. In that situation, the motor may hum because it receives electricity but cannot rotate.
Switch the unit off immediately when it hums without grinding. Continuing to energize a stalled motor can cause overheating and further damage.
Impellers or Grinding Lugs
Impellers are movable metal components mounted on the spinning plate. They push food toward the stationary grind ring.
They are not sharp blades. InSinkErator’s official guidance describes impellers on a spinning plate using centrifugal force to move food against the grind ring.
Impellers may become stuck because of:
- Hardened food residue
- Metal objects
- Bone fragments
- Broken glass
- Corrosion
- Internal wear
With electrical power disconnected, some manufacturers recommend checking whether the impellers move freely. Always follow the instructions for the specific model.
Grind Ring
The grind ring surrounds the spinning plate. Its textured surface breaks food into small particles as the impellers press waste against it.
A damaged or heavily corroded grind ring may cause:
- Slow grinding
- Repeated clogging
- Unusual scraping sounds
- Large food particles entering the drain
- Reduced performance
The grind ring is an internal component. On many residential models, replacing the entire disposal is more practical than opening the housing to replace the ring.
Motor
The electric motor powers the turntable. Motor strength, speed, and design vary between disposal models.
Possible motor-related symptoms include:
- Humming without rotation
- Overheating
- Burning odor
- Repeated reset-button trips
- Slow startup
- Intermittent operation
- Complete silence despite confirmed power
Humming commonly indicates a jam, but it can also point to a damaged motor or another internal fault. A silent unit may have a power, switch, cord, overload, or motor problem.
Bearings and Internal Seals
Bearings support the motor shaft and rotating grinding mechanism. Worn bearings may produce roaring, squealing, grinding, or rumbling sounds.
Internal seals prevent water from entering the motor section. When a seal fails, water may appear at the bottom of the appliance.
Bearing or internal-seal replacement normally requires opening the sealed body. For most household models, complete replacement is the more economical and reliable option.
Motor Housing
The motor housing surrounds the electrical and mechanical components in the lower portion of the disposal.
Before assuming the housing is leaking, dry the entire appliance. Water from the sink flange, dishwasher hose, or discharge elbow can travel downward and make the lower body appear to be the source.
If water truly exits through the lower housing or electrical-cover area, disconnect the power immediately. The disposal will usually need to be replaced.
Dishwasher Inlet
Many disposals have a side inlet near the upper housing for a dishwasher drain hose.
The connection generally includes:
- An inlet nipple
- A dishwasher drain hose
- A hose clamp
- An internal drainage passage
- A knockout plug in a new disposal
A loose clamp, split hose, clogged passage, or damaged inlet can cause leaks or dishwasher-drainage problems.
Dishwasher Knockout Plug
A new disposal normally has a plastic plug sealing the dishwasher inlet. The plug stays in place when no dishwasher is connected.
When the dishwasher drains through the disposal, the installer must remove the plug. The loose plastic disc must then be retrieved from the grinding chamber before the appliance operates.
Failing to remove the knockout plug can prevent the dishwasher from draining. Removing it when no dishwasher is connected creates an open leak path.
Always follow the installation manual because knockout procedures vary by model.
Dishwasher Hose and Clamp
The dishwasher hose slides over the inlet nipple and is secured with a clamp.
Common problems include:
- Loose clamps
- Cracked hoses
- Incorrect hose sizes
- Kinked hose routing
- Food buildup in the connection
- A damaged inlet nipple
The dishwasher instructions and local plumbing rules may also require an air gap or high-loop arrangement.
Discharge Outlet
The discharge outlet releases the mixture of water and ground food into the drain system.
Its height and position affect plumbing alignment. When replacing a disposal, compare the distance from the sink flange to the center of the discharge outlet.
If the new outlet sits too low relative to the wall drain, the system may not drain properly.
Discharge Elbow
The discharge elbow connects the disposal outlet to the sink’s drainage system. It is normally curved and attached with screws, a flange, and a gasket.
A leak at this connection may result from:
- A damaged gasket
- Loose screws
- Uneven tightening
- A cracked elbow
- Incorrect pipe alignment
- Reuse of an old compressed gasket
Do not overtighten plastic fittings. Excessive force can distort the gasket or crack the elbow.
Discharge Gasket
The discharge gasket creates a watertight seal between the disposal outlet and drain elbow.
It may flatten, harden, tear, or move out of position. A damaged gasket usually causes water to appear when the sink drains or the disposal operates.
When installing a replacement appliance, use the new gasket supplied with it rather than reusing an old compressed seal.
Tailpipe and Drain Kit
The tailpipe carries waste from the discharge elbow toward the P-trap.
A drain kit may contain:
- An elbow
- A tailpiece
- Slip-joint nuts
- Washers
- A flange
- Mounting screws
However, some kits do not include a P-trap. Check the package contents before purchasing.
U.S. Supply and F.W. Webb list disposal drain, mounting, gasket, cord, flange, and switch accessories as separate product categories, confirming that a complete installation may require more than one kit.
Flexible Discharge Tube
A flexible discharge tube can help when the disposal outlet and drain line have a small alignment difference.
However, flexible tubing should not be used to hide poor plumbing design. Deep ridges and unnecessary bends can collect food residue, while some local plumbing rules restrict flexible drain fittings.
Correcting the rigid plumbing layout is usually better than forcing a flexible tube through a severe bend.
P-Trap
The P-trap is part of the sink drainage system rather than the disposal itself. Nevertheless, it directly affects disposal performance.
It holds water to block sewer gases, but it can also collect grease, starch, and food particles. A disposal may run normally while the sink drains slowly because the clog is in the P-trap or a downstream pipe.
Do not assume every drainage problem begins inside the disposal.
Power Cord
A disposal may have a factory-installed cord, accept an approved cord kit, or require a hardwired connection.
A proper cord assembly can include:
- Grounded plug
- Insulated conductors
- Wire connectors
- Strain-relief clamp
- Electrical-cover plate
Do not use a random appliance cord. The cord must match the disposal’s voltage, amperage, grounding arrangement, entry design, and manufacturer requirements.
Some manufacturers also use proprietary quick-connect cords that are compatible only with particular product series.
Strain Relief
Strain relief secures the cord where it enters the disposal. It prevents pulling or twisting forces from reaching the internal wire connections.
Skipping this component can loosen wires or damage insulation. Always use the approved strain-relief fitting supplied with or specified for the cord kit.
Hardwired Electrical Connection
A hardwired disposal connects directly to the household circuit rather than plugging into an outlet.
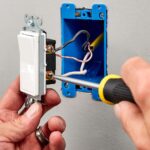
The circuit must provide proper grounding and comply with applicable electrical requirements. Disconnect power at the breaker before opening an electrical cover.
Damaged wiring, missing grounding, repeated breaker trips, or uncertainty about the circuit should be handled by a qualified electrician.
Wall Switch
A wall switch commonly controls a continuous-feed disposal.
When the appliance does not respond, possible causes include:
- Tripped circuit breaker
- Failed wall switch
- Bad receptacle
- Loose wiring
- Damaged power cord
- Tripped overload protector
- Jammed motor
- Failed motor
Confirm the power source before assuming the disposal itself has failed.
Sink-Top Air Switch
A sink-top air switch provides a control button on the countertop or sink deck. Pressing the button sends an air pulse through tubing to an electrical controller below the sink.
Moen explains that an air switch can be useful when no wall switch is available for a continuous-feed model.
A complete air-switch system may include:
- Decorative push button
- Mounting shank
- Sealing gasket
- Air tube
- Controller module
- Electrical receptacle
The visible button does not carry household line voltage, but the controller beneath the sink remains electrically powered.
Air-Switch Button, Tube, and Controller
These components may be sold separately.
The decorative button must fit the sink or countertop hole and connect to compatible tubing. The tubing must remain free of cracks, kinks, or loose connections.
The controller must match the disposal’s electrical load. A replacement button alone cannot operate the appliance without the air tube and controller.
Retail catalogs may list buttons, controller bases, and complete kits as separate products, so buyers should check exactly what is included.
Reset Button or Overload Protector
Many models include an overload protector on the bottom of the unit. It interrupts electrical power when the motor becomes overloaded or overheated.
InSinkErator identifies its overload protector as a red button underneath the disposal. If it will not remain pressed, the manufacturer recommends allowing the appliance to cool before trying again.
The protector may trip because of:
- A jam
- Too much food
- Extended operation
- Motor overheating
- An internal electrical fault
Do not repeatedly press the reset button without correcting the underlying problem.
Unjamming Socket and Disposal Wrench
Many disposals have a recessed hex socket on the bottom. A manufacturer-approved wrench or correctly sized Allen key can move the turntable manually.
With power disconnected, work the wrench back and forth until the turntable moves freely. Then inspect the chamber and remove visible objects with long-handled tongs or pliers.
Not every disposal uses a bottom socket. Some models require another procedure, so the manufacturer’s manual should always take priority.
How to Identify the Source of a Leak
Dry the disposal, sink bottom, hoses, and drain connections. Then place dry paper towels around the likely leak points.
Check these areas separately:
- Sink flange
- Mounting assembly
- Dishwasher inlet
- Discharge elbow
- Tailpipe
- Main housing
- Electrical-cover area
Fill the sink with water and observe the flange. Then drain the sink while checking the discharge connection. Run the dishwasher separately to test its hose and inlet.
Water can travel along the appliance body, so the point where it drips is not always where the leak begins.
Common Problems and Their Likely Causes
| Symptom | Possible cause |
| Water around the sink opening | Flange seal, gasket, or loose mount |
| Water near the dishwasher hose | Hose, clamp, inlet, or knockout issue |
| Water at the drain elbow | Discharge gasket, screws, or cracked elbow |
| Water from the lower housing | Failed internal seal or cracked housing |
| Disposal hums but does not turn | Jammed turntable or motor problem |
| Disposal remains silent | Breaker, outlet, switch, cord, reset, or motor |
| Reset button trips repeatedly | Jam, overheating, wiring fault, or failed motor |
| Dishwasher does not drain | Knockout plug, blocked hose, or clogged inlet |
| Excessive splashback | Torn, missing, or incorrect splash guard |
| Disposal becomes unusually loud | Foreign object, loose mount, or bearing damage |
| Sink drains slowly | Grinding chamber, P-trap, or downstream clog |
| Disposal vibrates | Loose mount, foreign object, or poor alignment |
| Air switch does not respond | Button, tubing, controller, outlet, or power |
| Batch-feed model does not start | Operating stopper or activation mechanism |
How to Clear a Jam Safely
Turn the wall or air switch off. Then unplug the disposal or switch off the correct circuit breaker. Do not rely only on the wall switch.
Use a flashlight to inspect the chamber. Never place your hand inside the disposal. Remove visible objects with long-handled tongs or pliers.
When the model has an unjamming socket, insert the approved wrench and move it back and forth. Continue until the mechanism rotates freely.
Allow an overheated motor to cool. Press the reset button only after clearing the jam. Restore power and test the unit with running water.
InSinkErator’s jam-clearing guidance likewise advises disconnecting the unit, using the appropriate wrench, checking the chamber, and confirming that the mechanism moves freely before restarting.
How to Choose Compatible Garbage Disposal Parts
Find the identification label on the appliance and record:
- Manufacturer
- Exact model number
- Product series
- Serial number when relevant
- Voltage
- Horsepower
- Mounting system
- Feed type
Then compare the replacement component’s:
- Manufacturer part number
- Diameter
- Height
- Material
- Mounting method
- Sink-opening size
- Sink-thickness range
- Drain size
- Electrical rating
- Included hardware
Part-number matching is more reliable than selecting by appearance.
A complete new disposal may include the flange, mounting assembly, stopper, splash guard, drain elbow, and power cord, but package contents vary. One Moen model listing, for example, includes several of those items, which shows why buyers should check what comes with the appliance before ordering accessories separately.
Are Replacement Components Universal?
Most components are not universally interchangeable.
Some drainpipes, washers, clamps, and nuts use common plumbing sizes. However, mounting gaskets, flanges, splash guards, power connections, Quick Lock mounts, batch-feed stoppers, air-switch controllers, and internal grinding components may be brand- or model-specific.
Words such as “standard,” “universal,” or “fits most” should be treated carefully. Confirm compatibility through the current manufacturer parts list or installation manual.
When to Repair an Individual Part
A small repair may be worthwhile when the problem involves:
- Removable splash guard
- Sound baffle
- Stopper
- Strainer
- Mounting gasket
- Dishwasher hose
- Hose clamp
- Discharge gasket
- Drain elbow
- Approved power cord
- Air-switch button or tube
- Replaceable mounting hardware
These parts are generally more accessible than internal motor or grinding components.
When to Replace the Complete Disposal
Replacement is usually the better option when:
- The housing is cracked
- Water leaks through the motor body
- The motor has burned out
- Bearings make severe noise
- Internal corrosion is extensive
- The unit jams repeatedly
- Electrical insulation is damaged
- Internal parts are unavailable
- Repair costs approach the cost of a new appliance
Stop operating the disposal immediately when water reaches electrical components or the unit produces smoke or a burning odor.
Maintenance That Protects Garbage Disposal Parts
Run cold water before turning on the disposal. Keep the water flowing while food is being ground and briefly after the chamber clears.
Feed scraps gradually rather than forcing a large quantity into the appliance at once.
Avoid putting these materials into the unit unless the manufacturer specifically permits them:
- Metal
- Glass
- Plastic
- Utensils
- Large bones
- Fruit pits
- Grease
- Paint or chemicals
- Nonfood objects
Clean the removable splash guard regularly because food collects beneath it. Disconnect electrical power before cleaning near the disposal opening.
Listen for new vibration, scraping, humming, or grinding noises. Early inspection may prevent a small obstruction from damaging the motor or internal mechanism.
Common Myths About Garbage Disposals
The first myth is that disposals contain sharp blender blades. Most standard models use impellers and a stationary grind ring instead.
The second myth is that ice sharpens the blades. Since standard models do not have knife-like blades, ice cannot sharpen them. It may loosen some residue, but it should not be presented as a sharpening method.
The third myth is that every flange or gasket fits every disposal. Proprietary mounting systems and model-specific gaskets show why compatibility must be verified.
The fourth myth is that the reset button repairs the appliance. It only restores power after an overload. It does not remove a jam or fix a failed motor.
Finally, an air switch does not eliminate electricity. It moves the user-facing switching action to an air-operated button, while the controller and disposal remain connected to electrical power.
Frequently Asked Questions About Garbage Disposal Parts
The main components include the sink flange, mounting assembly, splash guard, grinding chamber, turntable, impellers, grind ring, motor, dishwasher inlet, discharge elbow, reset button, power connection, and operating switch.
Most standard household models do not have sharp knife blades. They use movable impellers to push food against a stationary grind ring.
No. Many mounting, sealing, control, and electrical components are designed for specific brands or model families. Always verify the manufacturer part number.
A humming sound usually means that electricity is reaching the motor but the turntable cannot rotate. A jammed object is a common cause, although motor damage is also possible.
It is generally an overload protector. It restores power after the motor shuts down because of overheating or excessive load.
Water may be traveling down from the flange, dishwasher inlet, or discharge elbow. When it truly comes through the lower housing, an internal seal or housing failure is likely.
Yes, when the model uses a removable guard. Other models integrate the guard into the mounting gasket and require the disposal to be lowered.
The dishwasher may be unable to drain through the disposal. The plug should be removed only when a dishwasher hose is connected.
No. The cord must match the manufacturer’s voltage, grounding, strain-relief, wiring, and connection requirements.
It is a sink- or countertop-mounted button that sends air pressure through a tube to an electrical controller beneath the sink.
Locate the disposal label, record the exact model number, and compare the manufacturer part number, dimensions, mounting style, electrical design, and package contents.
A cracked main housing should not be patched with household sealant. Complete disposal replacement is generally the safer and more reliable solution.
Contact a qualified professional for internal housing leaks, hardwired electrical work, repeated breaker trips, damaged wiring, major drain alterations, or any repair that cannot be completed safely.
Conclusion
Understanding garbage disposal parts makes diagnosing leaks, jams, unusual sounds, and power problems much easier. The sink flange, mounting gasket, splash guard, grinding chamber, impellers, grind ring, dishwasher inlet, discharge elbow, power supply, switch, and overload protector each perform a separate function.
The first step is always to identify the exact source of the problem. A leak at the sink flange requires a different repair from a leak at the dishwasher inlet or motor housing. Similarly, a humming appliance requires different troubleshooting from a silent one.
External components may be economical to replace. Internal leaks, severe corrosion, failed bearings, and motor damage usually justify replacing the entire disposal.
Always disconnect electrical power before inspection, keep hands out of the grinding chamber, use approved replacement components, and follow the manual for the exact model.