
Waterproof peel and stick floor tile can transform a kitchen, bathroom, laundry room, basement, or entryway without mortar, grout, nails, or a complicated flooring installation. These self-adhesive vinyl tiles and planks are affordable, easy to cut, and available in wood, stone, marble, geometric, and vintage designs.
However, the word “waterproof” needs careful explanation. Some brands describe the vinyl material as 100 percent waterproof, while others classify similar products as water resistant. Even when water cannot damage the vinyl surface itself, moisture may still enter through seams, weaken the adhesive, or become trapped underneath the flooring.
Therefore, the right product depends on the room, the amount of moisture, the condition of the subfloor, and the manufacturer’s installation rules.
| Feature | Important information |
| Main material | Usually solid or layered vinyl |
| Installation method | Self-adhesive backing pressed directly onto the subfloor |
| Common tile size | 12 × 12 inches |
| Common plank size | 36 × 6 inches |
| Typical water rating | Water resistant or manufacturer-described waterproof |
| Best locations | Kitchens, powder rooms, laundry rooms, entryways, bedrooms |
| High-risk locations | Showers, wet rooms, damp concrete, frequently flooded basements |
| Best substrate | Clean, flat, smooth, dry, and stable surface |
| Main benefits | Affordable, DIY-friendly, easy to cut, many designs |
| Main limitations | Seams, scratches, dents, lifting edges, adhesive residue |
| Cleaning method | Regular sweeping and careful damp mopping |
| General lifespan | Often estimated at 2 to 10 years, depending on use and quality |
What Is Waterproof Peel and Stick Floor Tile?
Peel-and-stick flooring is a type of self-adhesive floor covering. Each tile or plank has adhesive on the back, protected by a removable paper or plastic liner. During installation, the backing is peeled away and the flooring is pressed onto a prepared surface.
Unlike ceramic tile, it generally requires no mortar, tile saw, grout, spacers, or specialized flooring equipment. Unlike click-lock vinyl, each piece bonds directly to the surface below rather than connecting mechanically to neighboring planks.
Art3d divides its flooring range into peel-and-stick floor tiles, peel-and-stick planks, and click-lock planks. Its self-adhesive products include 12-inch square tiles, hexagonal pieces, herringbone patterns, and 36 × 6-inch wood-look planks. The company markets these tiles as waterproof, wear resistant, and suitable for installation without additional glue or power tools. These statements are manufacturer claims and should be confirmed on the exact product page before purchase.
WallPops sells self-adhesive vinyl flooring under the FloorPops name. A representative FloorPops product contains ten 12 × 12-inch tiles, covers 10 square feet, measures approximately 0.06 inches thick, and uses permanent adhesive. WallPops describes these products as water resistant and washable rather than completely waterproof.
Is Peel-and-Stick Floor Tile Really Waterproof?
Some peel-and-stick vinyl tiles may have a waterproof material layer. That does not necessarily mean the entire installed floor is waterproof.
A finished peel-and-stick floor contains many joints. Water may remain on the surface, move through a small gap, reach an imperfectly bonded edge, or penetrate where a tile has lifted. Once moisture reaches the adhesive or subfloor, it may cause:
- Loss of adhesion
- Curling or lifting edges
- Staining beneath the flooring
- Mold or mildew growth
- Damage to wood-based subfloors
- Trapped moisture over concrete
- Odors or discoloration
Consequently, shoppers should ask what a waterproof claim actually covers:
| Claim | What it may mean |
| Waterproof vinyl material | Water does not easily penetrate or swell the tile itself |
| Water-resistant surface | The tile can tolerate ordinary spills and damp cleaning |
| Waterproof flooring system | The full assembly, including joints, is designed to resist moisture |
| Suitable for bathrooms | Approved for certain bathroom areas, not necessarily showers |
| Washable | Can be cleaned carefully, but should not be flooded |
Art3d calls its peel-and-stick tiles 100 percent waterproof. In contrast, WallPops describes FloorPops as water resistant and washable. This difference demonstrates why the exact product documentation matters more than a general search term or retailer category.
Waterproof Does Not Mean the Room Is Waterproof
A vinyl tile cannot replace structural waterproofing.
Even a product labeled waterproof should not be treated as:
- A shower pan
- A shower membrane
- A bathroom tanking system
- A concrete moisture barrier
- Protection against flooding
- A repair for a leaking appliance
- A solution for damp or moldy subfloors
The top surface may survive water while the floor underneath remains vulnerable. Therefore, leaks, drainage problems, concrete moisture, damaged plumbing, and subfloor deterioration must be corrected before installation.
Rigid-core luxury vinyl provides a useful comparison. Floor & Decor’s waterproof vinyl category consists entirely of floating or locking products rather than self-adhesive tiles. The retailer states that proper installation and subfloor preparation remain necessary even with flooring marketed as waterproof.
Water-Resistant vs. Waterproof Peel-and-Stick Tile
A water-resistant product is designed to handle limited moisture exposure. It may tolerate small spills, splashes, ordinary humidity, and damp mopping when water is removed promptly.
A waterproof product claim usually means the vinyl does not absorb water or lose its structure after contact with moisture. Nevertheless, the claim may not include the adhesive, seams, perimeter, subfloor, or installation mistakes.
For most households, the safest rule is simple:
Treat peel-and-stick vinyl as a moisture-tolerant surface, not as a waterproofing system.
This approach prevents shoppers from using a decorative floor tile in locations where a professionally specified wet-area product is required.
Best Rooms for Peel-and-Stick Vinyl Flooring
Self-adhesive vinyl works best in interior rooms with controlled temperatures, limited standing water, and a suitable subfloor.
Kitchens
A kitchen is one of the most common locations for peel-and-stick flooring. Vinyl is easy to wipe clean, and patterned tiles can update an older floor without a major renovation.
However, moisture risks remain near:
- Sinks
- Dishwashers
- Refrigerators with water lines
- Pet bowls
- Exterior doors
- Ice makers
- Leaking pipes
Small spills should be wiped up promptly. A leaking dishwasher or refrigerator can send water below the tiles before the problem becomes visible.
Cooking grease must also be removed from the old floor before installation. Even a thin greasy film can prevent the adhesive from bonding properly.
Bathrooms and Powder Rooms
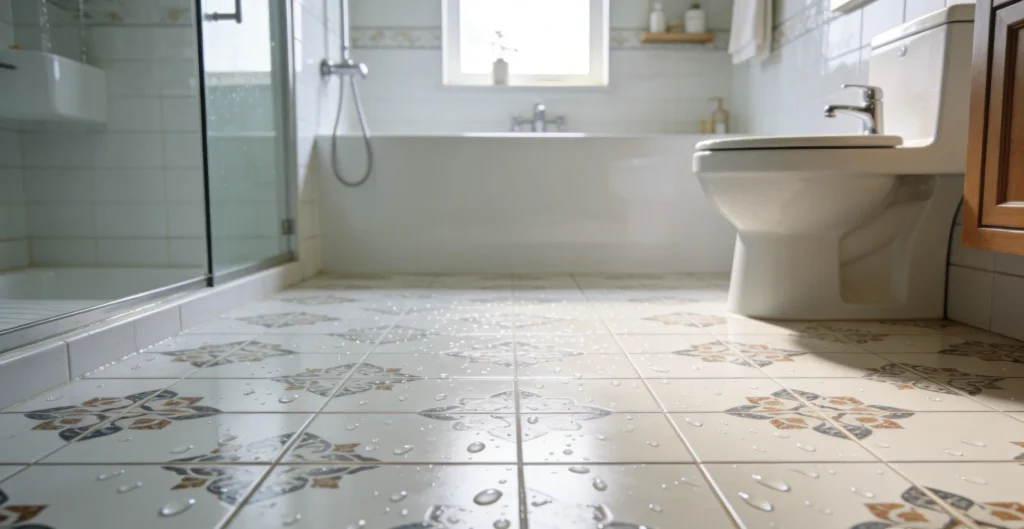
Peel-and-stick tile may work in powder rooms and in dry areas of a bathroom when the manufacturer approves that use.
Suitable locations may include:
- Floors around a vanity
- Half bathrooms without a bathtub
- Guest bathrooms with limited use
- Areas outside a shower or bathtub
- Toilet areas with a dry, stable subfloor
Standard self-adhesive vinyl should generally not be installed:
- Inside a shower
- On a shower curb
- In a steam room
- On a continuously wet floor
- Where water regularly pools
- Over an active leak
- Over a damaged or swollen subfloor
WallPops describes FloorPops as water resistant, not waterproof. Therefore, its flooring should not be treated as a substitute for a bathroom waterproofing membrane.
Laundry Rooms
Peel-and-stick vinyl can be a practical laundry-room surface because it is easy to clean and relatively affordable.
Nevertheless, washing machines create a greater moisture risk than ordinary foot traffic. Check hoses, connections, drainpipes, and shutoff valves before covering the floor. A leak tray or water alarm may also help detect a problem early.
Avoid installing over a floor that already shows signs of swelling, softness, staining, or moisture damage.
Entryways and Mudrooms
Self-adhesive vinyl is easy to sweep and can handle ordinary wet shoes when water is removed promptly.
However, grit and sand can scratch the printed surface. Bob Vila’s Art3d test praised the planks for easy installation and realistic wood appearance but found that their printed surface could scratch under sharp or heavy objects.
Use appropriate entry mats and sweep regularly. Before using a rubber-backed mat, verify that the backing is compatible with vinyl because some materials can discolor flooring.
Bedrooms and Living Areas
Bedrooms, dressing rooms, home offices, and low-traffic living spaces often present fewer moisture problems. These rooms can be good locations for wood-look peel-and-stick planks.
Because the material is thin, it works best over a smooth subfloor. Cracks, debris, textured surfaces, and deep joints may remain visible through the finished floor.
Basements
A basement is suitable only when the concrete is dry and moisture conditions are controlled.
Do not assume that apparently dry concrete is moisture free. Ground moisture can move through a slab and weaken self-adhesive flooring from below.
Before installation:
- Check for visible dampness
- Repair water entry
- Address drainage problems
- Follow the manufacturer’s moisture-testing requirements
- Use an approved primer where required
- Do not cover mold, efflorescence, or damaged concrete
- Confirm that the product is approved for below-grade installation
Rigid-core waterproof vinyl may be more appropriate than peel-and-stick tile for some basement projects, but it also requires proper moisture control and substrate preparation. Floor & Decor markets locking waterproof vinyl for basements while emphasizing that the floor must be installed correctly.
Where Peel-and-Stick Floor Tile Should Not Be Used
Most standard self-adhesive vinyl flooring is unsuitable for:
- Shower floors
- Wet rooms
- Saunas
- Outdoor patios
- Open porches
- Garages
- Areas exposed to freezing temperatures
- Frequently flooded basements
- Rough or heavily textured concrete
- Loose existing flooring
- Unstable subfloors
- Surfaces contaminated with wax or grease
- Floors with unresolved moisture problems
- Radiant-heated floors unless specifically approved
- Working fireplace surrounds unless approved for heat exposure
Temperature matters because vinyl expands and contracts. Permanent adhesive may also perform poorly in rooms that become excessively hot or cold.
Main Types of Peel-and-Stick Floor Tile
Several product formats appear under the same general keyword.
Square Vinyl Tiles
The 12 × 12-inch format is common because each tile covers one square foot. This makes room calculations relatively simple.
Square tiles are available in:
- Marble effects
- Slate looks
- Terrazzo patterns
- Black-and-white designs
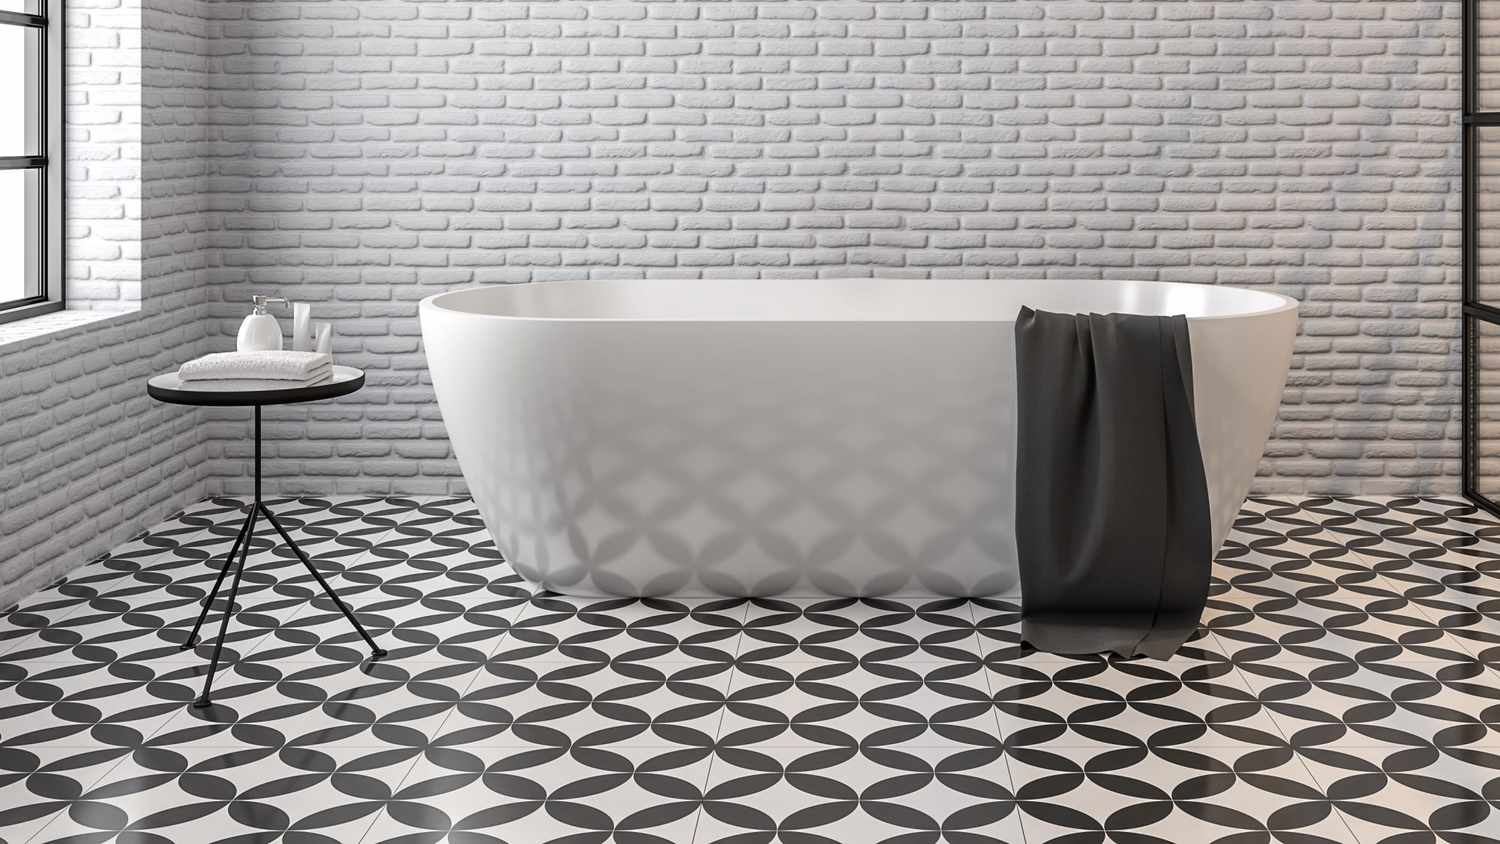
- Moroccan motifs
- Geometric patterns
- Checkerboard styles
- Floral and vintage prints
- Cement-tile effects
Representative FloorPops products use 12-inch square virgin-vinyl tiles with permanent adhesive, a textured low-luster finish, and a water-resistant washable surface.
Wood-Look Vinyl Planks
Wood-look self-adhesive planks commonly measure 36 × 6 inches. They can be arranged in straight, staggered, diagonal, or herringbone patterns.
Bob Vila tested Art3d planks of this size. A 36-piece box covered approximately 54 square feet. The testers found them easy to cut and install, although a herringbone layout required more precise perimeter cuts.
A simple staggered pattern is usually easier for beginners and produces less waste.
Geometric and Herringbone Tiles
Patterned flooring can make a small room more visually interesting. However, printed lines and repeating motifs make alignment errors more noticeable.
Before installation:
- Open several boxes
- Compare colors and print direction
- Dry-lay the pattern
- Rotate pieces when necessary
- Check alignment from several angles
- Avoid placing all difficult cuts in one visible area
Minor print variation may occur between pieces or production batches.
Hexagonal Tiles
Hexagonal self-adhesive tiles provide a more traditional tile appearance without grout. Art3d lists peel-and-stick hexagonal products measuring approximately 11.8 × 10.2 inches.
Although the shape creates a decorative result, it also requires more careful planning around walls and fixtures.
Benefits of Waterproof Peel and Stick Floor Tile
The main advantages include:
- No mortar or grout
- No tile saw for most projects
- Fast installation
- Low initial cost
- Easy handling
- Many colors and patterns
- Individual tile replacement
- Minimal floor height increase
- Less mess than traditional tile
- Suitable for small DIY projects
- Can cover some approved existing floors
- Easy routine cleaning
Bob Vila tested five peel-and-stick flooring products and scored them for installation, appearance, durability, cleaning, and value. FloorPops Medina was selected as the best overall product, while Art3d planks received the value recommendation. However, each tested floor was evaluated for only about two weeks, so the findings do not prove long-term performance.
Disadvantages and Limitations
Self-adhesive flooring is not the best option for every project.
Potential disadvantages include:
- Edges can lift
- Seams may admit moisture
- Thin surfaces can scratch
- Heavy furniture can cause dents
- Adhesive may fail over dust or grease
- Uneven subfloors may show through
- Pattern alignment can be difficult
- Removal may leave residue
- Replacement colors may not match
- Strong adhesive may damage painted surfaces
- Lifespan may be shorter than ceramic or rigid-core vinyl
- Water damage underneath may remain hidden
Art3d’s own customer-review section includes both positive reports and complaints involving adhesion, damaged pieces, missing tiles, and color differences. Reviews are individual experiences rather than controlled tests, but they illustrate how preparation and quality control may affect the finished project.
How to Choose the Best Product
Before buying, compare more than pattern and price.
Confirm the Water Rating
Look for the exact words used by the manufacturer:
- Waterproof
- Water resistant
- Moisture resistant
- Washable
- Suitable for bathrooms
- Suitable for below-grade use
Do not assume these terms mean the same thing.
Also check whether the warranty excludes:
- Flooding
- Standing water
- Moisture beneath the flooring
- Improper cleaning
- Installation over an unapproved substrate
- Bathrooms or commercial spaces
- Radiant heat
- Excessive temperature changes
Check the Approved Substrates
A product may be approved for plywood but not for linoleum. Another may require primer over concrete. Some manufacturers discourage applying self-adhesive tile directly over grouted ceramic flooring.
The product instructions should clearly identify approved bases.
Examine Thickness
Thicker tiles may feel more substantial and hide tiny imperfections better than very thin flooring. However, greater thickness can make precise cutting more difficult.
Bob Vila’s tested FloorPops Medina tiles measured approximately 0.06 inches thick. The tester found them durable and easy to clean but noted that a sharp knife and steady cutting technique were needed around obstacles.
Compare Surface Construction
Look for information about:
- Vinyl type
- Printed design layer
- Protective wear surface
- Texture
- Slip resistance
- Scratch resistance
- Stain resistance
- Chemical resistance
- Indoor-air certification
A realistic design does not guarantee a scratch-resistant finish. Consider where furniture, pet claws, shoes, sand, or rolling appliances may damage the surface.
Understand the Adhesive
Self-adhesive flooring may use permanent pressure-sensitive adhesive. It is not always repositionable and may not be renter safe.
Some products may require primer. Others prohibit additional flooring glue. Primer and adhesive are not identical:
- Primer prepares the surface and improves bonding.
- Additional adhesive adds a separate glue layer.
Never add construction adhesive, contact cement, or flooring glue unless the manufacturer specifically permits it. The wrong adhesive may react with the vinyl, create bumps, stain the surface, prevent future removal, or void the warranty.
Order Samples
A sample allows you to check:
- True color
- Print scale
- Texture
- Surface shine
- Flexibility
- Thickness
- Pattern repetition
- Compatibility with cabinets and walls
View the sample in daylight and artificial light because colors can change under different lighting.
Read Independent Testing Carefully
Editorial testing can reveal ease of use and short-term durability, but testing conditions matter.
Bob Vila tested five of nine recommended products for two weeks each. Therefore, its results are useful for comparing installation and initial performance, but they cannot establish a five- or ten-year lifespan.
How Much Flooring Do You Need?
Measure the room’s maximum length and width.
For a rectangular room:
Length × width = square footage
Example:
10 feet × 12 feet = 120 square feet
Add extra material for waste:
- Simple square layout: approximately 10 percent
- Complex room or diagonal pattern: approximately 12 to 15 percent
- Herringbone layout: potentially 15 percent or more
For a 120-square-foot room with 10 percent waste:
120 + 12 = 132 square feet
When one package covers 10 square feet:
132 ÷ 10 = 13.2
Because partial packages are not normally available, purchase 14 boxes.
Keep several unused matching tiles for repairs. A future order may come from a different manufacturing batch and may not match the original color exactly.
Tools and Materials
A typical project may require:
- Tape measure
- Pencil
- Chalk line or straightedge
- Carpenter’s square
- Sharp utility knife
- Replacement blades
- Metal ruler
- Floor scraper
- Vacuum
- Degreasing cleaner approved for the substrate
- Patch or leveling compound
- Manufacturer-approved primer
- Hand roller or heavy floor roller
- Knee pads
- Spare tiles
WallPops states that its products do not require grout or special tools. Nevertheless, the company’s representative product uses permanent adhesive, and correct pressure is still necessary for a strong bond.
How to Prepare the Subfloor
Preparation is the most important part of the installation.
The floor should be:
- Clean
- Smooth
- Flat
- Dry
- Stable
- Free from dust
- Free from grease
- Free from wax
- Free from soap residue
- Free from loose paint
- Free from moisture problems
Thin vinyl can reveal small imperfections. A grain of dirt, dried paint drop, screw head, or deep joint may produce a visible bump.
Preparing Plywood
Check that plywood is:
- Securely fastened
- Smooth
- Dry
- Free from movement
- Properly supported
- Free from raised fasteners
- Patched at gaps and damaged areas
Use only a patching or leveling product approved for the floor and adhesive.
Preparing Concrete
Concrete must be clean, flat, dry, and free from excessive moisture or alkalinity.
New concrete may require a long curing period. Existing basement slabs can contain moisture even when the surface looks dry.
Follow the product’s instructions for:
- Moisture testing
- pH or alkalinity testing
- Priming
- Below-grade installation
- Crack repair
- Surface preparation
Do not use peel-and-stick vinyl to hide a damp-slab problem.
Installing Over Ceramic Tile
Installation over ceramic tile is risky when grout joints are deep or the surface is uneven.
Possible problems include:
- Grout lines showing through
- Reduced adhesive contact
- Tile movement
- Visible ridges
- Moisture trapped in joints
- Cracks transferring through the vinyl
Bob Vila’s testers installed FloorPops over grouted tile and reported no immediate adhesion problem during the short test. However, the article acknowledges that the manufacturer did not recommend this method. A two-week result should not override the official installation instructions.
Where installation is permitted, the joints may need to be filled and leveled first.
Installing Over Linoleum or Sheet Vinyl
Do not assume old resilient flooring is a suitable substrate.
It may contain:
- Wax
- Polish
- Embossed texture
- Cushioned backing
- Loose edges
- Moisture
- Chemical residue
- Movement
Some manufacturers do not recommend installation over linoleum or floating vinyl. Follow the exact product guide.
Older flooring or adhesive may also contain hazardous material. Do not sand, scrape, drill, or mechanically disturb an unknown older floor without determining whether professional testing is necessary.
How to Install Waterproof Peel and Stick Floor Tile
Step 1: Read the Instructions
Review the complete installation and warranty documents before opening the boxes.
Check:
- Approved substrates
- Room-temperature range
- Acclimation requirements
- Primer instructions
- Moisture limits
- Expansion requirements
- Rolling requirements
- Cleaning delay
- Radiant-heat restrictions
Requirements vary between brands.
Step 2: Acclimate the Flooring
When required, place unopened packages flat in the installation room for the stated period.
Do not stand boxes vertically because the pieces may bend. Keep the room within the manufacturer’s specified temperature range before, during, and after installation.
Step 3: Remove Baseboards When Practical
Removing baseboards can produce a cleaner perimeter and allow the flooring to expand without being trapped tightly against the wall.
Number the trim pieces if they will be reinstalled.
Step 4: Clean and Repair the Floor
Vacuum thoroughly. Remove grease, adhesive residue, wax, dirt, paint, and loose material.
Fill holes, cracks, deep grout joints, and low areas with an approved compound. Sand or scrape only when safe for the existing material.
Allow cleaners, primers, and repairs to dry completely.
Step 5: Find the Room Center
Measure opposite walls and mark the center points. Create two perpendicular lines crossing at the center of the room.
Check the lines with a square. An inaccurate starting line will affect every row.
Step 6: Dry-Lay the Pattern
Place tiles on the floor without removing their backing.
Check:
- Border-piece width
- Pattern direction
- Color variation
- Alignment at doorways
- Position around toilets and cabinets
- Visibility from the entrance
Shift the starting point when the planned layout would create very narrow perimeter pieces.
Step 7: Mix Tiles From Several Boxes
Using pieces from multiple boxes can distribute small color and print variations throughout the room instead of concentrating them in one section.
Inspect every tile before installation.
Step 8: Remove the Backing
Peel away the protective liner without touching the adhesive more than necessary. Dust and skin oils can reduce adhesion.
Do not remove the backing until the tile is ready to be positioned.
Step 9: Align and Press
Position one edge carefully along the reference line. Lower the tile gradually and press from the center toward the edges.
Avoid stretching or bending thin vinyl.
Install neighboring pieces with tight, even joints, but do not overlap them.
Step 10: Cut Perimeter Pieces
Place a full tile over the previous row, then use another tile or measuring method to mark the required cut.
Score the surface several times with a sharp utility knife and snap or cut through the material according to the manufacturer’s instructions.
Change blades frequently. A dull blade can tear the printed finish.
Step 11: Cut Around Toilets and Obstacles
Create a cardboard template for complicated shapes. Transfer the template to the tile and cut gradually.
Do not force one large cut when several small cuts will produce a cleaner result.
Step 12: Roll the Floor
Firm pressure activates and spreads pressure-sensitive adhesive.
Use the roller weight and technique specified by the manufacturer. Pay special attention to:
- Seams
- Corners
- Perimeter pieces
- Doorways
- Areas around fixtures
Recheck the floor for lifting edges.
Step 13: Allow the Adhesive to Cure
Avoid washing the floor or placing excessive stress on it until the adhesive has had time to cure.
Bob Vila reported that FloorPops adhesive may take up to 30 days to cure fully, although the tiles could be used before that point. The exact curing requirement should come from the current product instructions.
Should You Use Extra Adhesive?
Extra adhesive is not automatically recommended.
Bob Vila notes that some manufacturers may recommend additional adhesive on certain plywood subfloors. However, this advice cannot be applied universally.
Use additional glue only when all three conditions are met:
- The tile manufacturer permits it.
- The adhesive manufacturer approves it for that vinyl product and substrate.
- The method does not invalidate the flooring warranty.
More glue does not always mean a better installation.
Should Peel-and-Stick Floor Tile Be Grouted?
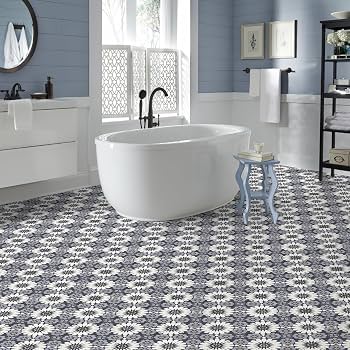
Most standard self-adhesive vinyl floor tiles should not be grouted unless they are specifically manufactured as groutable tiles.
Grout may:
- Crack as flexible vinyl moves
- Trap moisture
- Damage tile edges
- Interfere with expansion
- Create cleaning problems
- Void the warranty
Do not use grout as a way to make a non-waterproof floor waterproof.
Can You Seal the Seams?
Some homeowners consider applying seam sealer, clear caulk, polyurethane, or another coating.
Do not apply a topcoat or seam product unless the flooring manufacturer approves it. An incompatible coating may:
- Discolor the vinyl
- Remain sticky
- Crack
- Peel
- Change slip resistance
- Trap moisture
- Void the warranty
Sealing the visible surface also does not repair an unsuitable or damp subfloor.
Cleaning and Maintenance
Regular care helps protect the finish and adhesive.
Recommended habits include:
- Sweep frequently
- Vacuum with a hard-floor setting
- Wipe spills quickly
- Damp-mop rather than flood-mop
- Use a vinyl-approved cleaner
- Place protective pads under furniture
- Lift furniture instead of dragging it
- Use compatible entry mats
- Keep pet nails trimmed
- Retain spare tiles for repairs
Floor & Decor recommends regular sweeping or vacuuming, damp mopping with a manufacturer-approved cleaner, avoiding abrasive scrubbers, and using mats and furniture pads to limit scratches and dents.
Can You Use a Steam Mop?
A steam mop should be avoided unless the exact flooring manufacturer explicitly permits it.
Heat and vapor can:
- Enter seams
- Soften adhesive
- Cause edge lifting
- Create trapped condensation
- Damage the printed layer
- Affect the warranty
The term waterproof does not automatically mean steam safe.
How to Replace a Damaged Tile
One advantage of self-adhesive flooring is that a single damaged piece can often be replaced.
General replacement process:
- Warm the damaged tile gently when permitted.
- Lift one edge with a flat scraper.
- Pull the tile away slowly.
- Remove adhesive residue according to the manufacturer’s instructions.
- Repair and clean the exposed substrate.
- Allow the surface to dry.
- Install a matching replacement tile.
- Press or roll it firmly.
Bob Vila notes that adhesive becomes harder over time and that warming an older tile can make removal easier.
Is Peel-and-Stick Flooring Removable?
It is removable in the sense that it can usually be scraped or peeled from the floor. That does not mean removal will be clean or damage free.
Permanent adhesive may:
- Leave sticky residue
- Lift paint
- Pull up floor finish
- Tear paper underlayment
- Damage weak wood fibers
- Require scraping
- Leave visible color differences
Therefore, peel-and-stick floor tiles should not automatically be marketed as renter friendly. Renters should obtain permission and test removal in a hidden area before covering a valuable or painted floor.
How Long Does Peel-and-Stick Floor Tile Last?
Bob Vila gives a broad estimated lifespan of 2 to 10 years, depending on product quality and daily wear. This is an editorial estimate, not a universal warranty.
Actual lifespan depends on:
- Adhesive quality
- Subfloor preparation
- Moisture exposure
- Traffic
- Tile thickness
- Surface durability
- Temperature stability
- Cleaning methods
- Furniture protection
- Installation accuracy
A floor in a lightly used bedroom may last longer than the same product in a busy household entryway.
Cost Factors
The total project cost depends on more than the price per box.
Include:
- Tile or plank cost
- Samples
- Waste allowance
- Primer
- Patching compound
- Floor scraper
- Utility-knife blades
- Roller rental
- Baseboard replacement
- Transition strips
- Shipping
- Spare tiles
- Removal of old flooring
- Professional moisture testing when needed
Prices and stock change frequently, so calculate the project using current package coverage rather than relying on an old price per square foot.
Peel-and-Stick Tile vs. Click-Lock Waterproof Vinyl
| Feature | Peel-and-stick vinyl | Click-lock waterproof vinyl |
| Installation | Adheres directly to substrate | Planks lock together and float |
| Thickness | Usually thin | Usually thicker |
| Water claim | Often water resistant; varies | Commonly marketed as waterproof |
| Subfloor smoothness | Extremely important | Flatness remains important |
| Underlayment | Usually not used unless specified | May have attached pad |
| Repairs | Individual tile can be replaced | May require disassembling rows |
| Initial cost | Usually lower | Usually higher |
| Best use | Fast cosmetic updates | Larger and longer-term renovations |
| Moisture protection | Seams and adhesive remain concerns | Locking joints may offer better protection |
| Floor height | Minimal increase | Greater height increase |
Floor & Decor’s waterproof-vinyl selection contained 186 products when reviewed, and every result was classified as floating or locking. Most had wood-look designs, while a smaller number used stone looks.
This does not mean every click-lock floor is better. It does show that flooring designed specifically for wet-room performance often uses a thicker rigid core and locking system rather than pressure-sensitive adhesive.
Peel-and-Stick Tile vs. Ceramic or Porcelain
Ceramic and porcelain flooring usually provide:
- Greater scratch resistance
- Better resistance to heavy traffic
- Longer potential lifespan
- More suitability for properly waterproofed wet areas
- Greater resistance to heat
However, they generally require:
- Mortar
- Grout
- More subfloor preparation
- Specialized cutting
- Longer installation
- Greater labor
- Higher floor height
- More difficult repairs and removal
Peel-and-stick tile is better viewed as an affordable renovation material than a direct replacement for professionally installed porcelain in every setting.
Best Choice by Situation
| Situation | Suggested approach |
| Powder room with smooth plywood | Peel-and-stick vinyl may be suitable |
| Bathroom with frequent standing water | Consider porcelain, sheet vinyl, or approved locking vinyl |
| Kitchen cosmetic update | Peel-and-stick tile may work with careful spill management |
| Uneven grouted ceramic floor | Level the surface or choose another installation system |
| Damp basement slab | Resolve moisture before installing any floor |
| Rental with delicate painted floor | Avoid permanent self-adhesive flooring |
| Low-traffic bedroom | Wood-look adhesive planks may be practical |
| Busy commercial entrance | Choose flooring rated for commercial traffic |
| Shower floor | Use an approved waterproof shower system |
| Radiant-heated floor | Use only a product specifically approved for radiant heat |
Common Installation Mistakes
The most common mistakes include:
- Believing all vinyl tile is completely waterproof
- Installing over dust or grease
- Ignoring moisture in concrete
- Covering deep grout lines
- Starting from an uneven wall
- Skipping the dry layout
- Failing to mix boxes
- Touching the adhesive
- Using unapproved extra glue
- Pressing tiles tightly against walls
- Failing to roll the floor
- Cleaning before the adhesive cures
- Using excessive water
- Installing over a loose floor
- Forgetting to purchase spare matching tiles
- Using a steam mop without approval
- Assuming grout will waterproof the seams
Careful preparation is usually more important than installation speed.
Frequently Asked Questions About Waterproof Peel and Stick Floor Tile
Some manufacturers describe the vinyl material as waterproof, while other brands describe similar tiles as water resistant. Even a waterproof tile surface may have seams through which water can reach the adhesive or subfloor.
It may be suitable for dry bathroom areas when the manufacturer approves the application. It should not automatically be used in showers, wet rooms, or areas where water regularly pools.
Standard self-adhesive vinyl tile is generally not suitable for shower floors. A shower needs an approved drainage and waterproofing system.
It may be installed over suitable concrete when the slab is smooth, flat, dry, properly cured, and within the manufacturer’s moisture limits. Primer may be required.
It may be possible only when the ceramic tile is secure and the surface has been leveled. Deep grout joints can show through and reduce adhesive contact. Follow the tile manufacturer’s substrate rules.
Some products do not permit installation over linoleum or cushioned vinyl. Wax, texture, movement, and chemical residue can weaken adhesion.
The requirement depends on the product and substrate. Concrete and porous surfaces often need an approved primer. Read the installation guide before applying anything.
Only when the manufacturer specifically permits it. Unapproved adhesive can damage the vinyl or invalidate the warranty.
Most should not be grouted unless they are specifically labeled as groutable. Grout does not make a standard self-adhesive floor waterproof.
A broad estimate is 2 to 10 years, although the result depends on flooring quality, preparation, traffic, moisture, and care.
Avoid steam unless the exact manufacturer states that it is safe. Heat and vapor can weaken adhesive or enter the seams.
Not always. Permanent adhesive may leave residue or damage painted and delicate flooring. Permission and a removal test are advisable.
Yes. A damaged piece can often be warmed, lifted, removed, and replaced with a matching spare tile.
Approximately 10 percent is common for simple layouts. Complex patterns, diagonal placement, and herringbone installations may require 12 to 15 percent or more.
Peel-and-stick tile is often cheaper and easier for small cosmetic projects. Click-lock waterproof vinyl is generally thicker and may be more suitable for long-term installations and higher-moisture rooms.
Conclusion
Waterproof peel and stick floor tile can be an effective choice for a fast, affordable, and decorative flooring update. It is available in square tiles, wood-look planks, herringbone patterns, stone effects, and geometric designs. Because the backing is already adhesive, many homeowners can complete a small room without mortar, grout, or professional flooring equipment.
Nevertheless, the word waterproof should never be accepted without checking the exact product. Art3d markets certain self-adhesive flooring as waterproof, while WallPops describes its comparable FloorPops products as water resistant. Even when the vinyl material resists water, seams, edges, adhesive, and the underlying floor remain important.
For the best result, choose a tile approved for the room and substrate, correct moisture problems first, prepare the floor carefully, follow the primer and adhesive rules, dry-lay the pattern, roll the installed tiles firmly, and keep standing water away from the seams.
In showers, wet rooms, flood-prone basements, or spaces with persistent moisture, a complete waterproof flooring and underlayment system is usually more appropriate than standard self-adhesive vinyl.