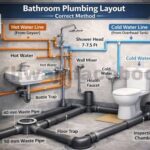

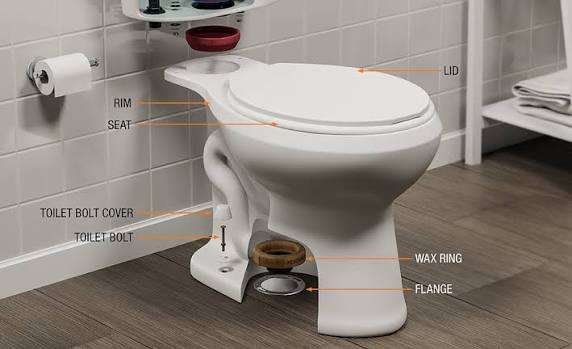
A toilet plumbing diagram helps homeowners understand what happens every time they flush. Most people use a toilet every day without thinking about the tank, bowl, drain, trap, vent, supply line, or shutoff valve behind the system. But when the toilet runs, clogs, gurgles, leaks, or smells bad, that simple diagram can make the problem much easier to understand.
Toilet plumbing may look confusing at first, but the basic idea is simple. Clean water enters the toilet through a supply line. The tank stores that water until you flush. When you press the handle, water rushes into the bowl and pushes waste into the drain. The waste then moves through the toilet outlet, into the main drain line, and finally toward the sewer or septic system. Vents help air move through the pipes so the drainage system can work smoothly.
This guide explains the main parts of a toilet, how they connect, what each part does, and how a diagram can help you spot common problems before they become expensive repairs.
What Is a Toilet Plumbing Diagram?
A toilet plumbing diagram is a visual layout that shows how a toilet connects to the home’s water supply and drainage system. It usually includes the toilet tank, bowl, water supply line, shutoff valve, fill valve, flush valve, flapper, overflow tube, trapway, toilet flange, drainpipe, and vent pipe.
Some diagrams are simple and made for homeowners. These diagrams show the basic parts in plain language. Others are more technical and used by plumbers, builders, or remodelers. A technical drawing may include pipe sizes, drain slope, vent locations, fixture spacing, and code requirements.
For a homeowner, the main value of a diagram is clarity. It shows where water comes from, where waste goes, and which parts may be causing trouble. For example, a running toilet often points to a flapper, fill valve, or water level issue. A gurgling toilet may point to a venting or drain problem. A leak at the floor may involve the wax ring, toilet flange, or drain connection.
Main Parts Shown in a Toilet Plumbing Diagram
A toilet has two main sections: the tank and the bowl. The tank stores clean water for flushing. The bowl holds water and connects to the drain system. Even one-piece toilets still follow the same basic function, even though the tank and bowl are molded together.
The tank contains several important parts. The fill valve brings fresh water into the tank after each flush. The flush valve releases water from the tank into the bowl. The flapper seals the flush valve until the toilet is flushed. The overflow tube prevents the tank from overflowing if the water level rises too high. The flush handle or button starts the flushing process.
Outside the toilet, the supply line brings water from the home’s plumbing system to the toilet. The emergency shutoff valve lets you stop water flow to the toilet during repairs or leaks. At the bottom of the toilet, the floor flange connects the toilet to the drainpipe. A wax ring or sealing gasket sits between the toilet and flange to prevent leaks and sewer gas from escaping.
A diagram may also show the toilet trapway. This is the curved internal passage inside the toilet bowl. It holds water and helps block sewer gas from coming back into the bathroom. From there, waste moves into the main drain line.
How a Toilet Works Step by Step
A toilet looks simple, but the flushing process involves several parts working together.
When you press the toilet handle, the handle lifts a chain inside the tank. That chain pulls up the flapper. Once the flapper lifts, water stored in the tank rushes through the flush valve and into the bowl. This sudden rush of water creates enough force to push waste and wastewater through the trapway.
As the bowl empties, waste moves into the drainpipe below the toilet. The toilet then refills. The fill valve senses that the tank water level has dropped. It opens and allows fresh water to enter the tank again. At the same time, a small refill tube sends some water into the overflow tube so the bowl gets refilled to its normal level.
When the tank reaches the correct water level, the float tells the fill valve to shut off. The flapper settles back over the flush valve and seals the opening. The toilet is then ready for the next flush.
This process happens quickly, but a toilet plumbing diagram makes each step easier to follow.
Water Supply Side of the Toilet
The water supply side of a toilet is the clean-water side. It begins with a pipe in the wall or floor. This pipe connects to a shutoff valve near the toilet. From there, a flexible supply connector runs to the bottom of the toilet tank.
The shutoff valve is important. If the toilet overflows, leaks, or needs repair, you can turn this valve clockwise to stop water from entering the tank. Every homeowner should know where this valve is and how to use it.
Inside the tank, the fill valve controls water flow. After each flush, it refills the tank and helps refill the bowl. If the fill valve wears out, the toilet may refill slowly, make noise, or keep running. Sometimes the issue is simple, such as a partially closed shutoff valve or sediment in the supply line. Other times, the fill valve needs replacement.
A good toilet diagram labels the supply line, shutoff valve, fill valve, float, overflow tube, and refill tube. These parts help explain many common toilet problems.
Drainage Side of the Toilet
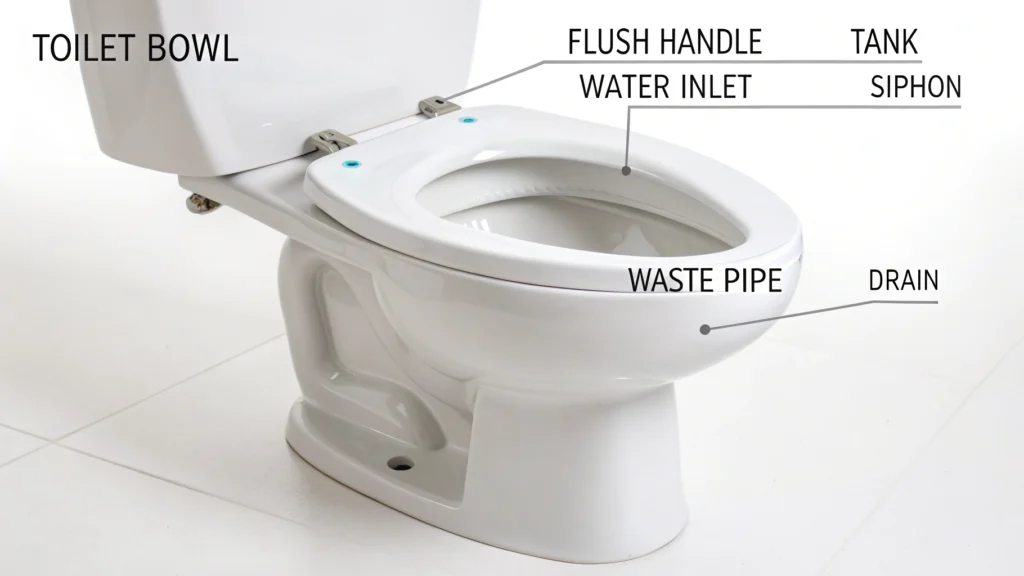
The drainage side handles wastewater. After flushing, waste leaves the bowl through the trapway and moves into the drainpipe below the toilet. The toilet connects to that drainpipe through the floor flange.
The flange is fixed to the floor and connected to the drain line. It keeps the toilet stable and lines it up with the drain opening. A wax ring or modern seal sits between the toilet and flange. This seal prevents water and sewer gases from escaping around the base of the toilet.
Drainage depends on gravity and proper pipe layout. Drainpipes need the correct slope so wastewater can move smoothly. If the slope is wrong, waste may sit in the pipe, causing clogs, odors, or slow flushing. If the pipe is damaged, offset, cracked, or blocked by roots, the toilet may back up again and again.
A diagram often shows how the toilet drain connects to the main waste line. In a full bathroom layout, the toilet drain may connect near the shower, tub, or basin drain, but the exact layout depends on the home’s plumbing design and local code.
Why Vent Pipes Matter
Vent pipes are one of the most overlooked parts of toilet plumbing. A vent allows air to enter the drainage system. Without proper air movement, wastewater may not drain correctly.
Think of a vent like a straw. If you cover the top of a straw with your finger, liquid stays inside. When you uncover it, the liquid flows out. Plumbing vents work in a similar way. They allow air into the pipes so water and waste can move freely.
A venting problem can cause gurgling sounds, slow flushing, sewer smells, or siphoned traps. If a toilet gurgles when a shower or sink drains, the problem may not be inside the toilet itself. It may be related to the vent or main drain line.
A clear toilet plumbing diagram should show the drain line and vent line. This helps homeowners understand that a toilet is not just connected to water and waste pipes. It is also part of a larger air-balanced drainage system.
Toilet Trap, P-Trap, and S-Trap Basics
Toilets have a built-in trapway inside the bowl. This curved passage keeps water in the bowl and blocks sewer gases from entering the bathroom. Other bathroom fixtures, such as basins, showers, and tubs, usually use separate P-traps under or near the fixture.
In some plumbing layouts, toilets may be described as having an S-trap or P-trap connection. The difference depends on how the toilet outlet connects to the drain. An S-trap usually exits through the floor. A P-trap usually exits through the wall. Many Australian toilet installations use S-trap toilets, while some wall-faced or back-to-wall designs may use P-trap connections.
The trap is important because sewer gases are unsafe and unpleasant. If a trap dries out, leaks, or siphons, odors can enter the room. That is why correct venting matters. The vent protects the water seal inside the trap.
Common Toilet Plumbing Layouts
A standard bathroom layout often includes a toilet, basin, shower, and sometimes a bathtub. In many designs, fixtures are placed close to one plumbing wall. This wall carries water supply lines, drain lines, and vent connections. Keeping fixtures close together can reduce pipe runs, lower costs, and make repairs easier.
A compact ensuite layout often uses short pipe runs and shared drain paths. The toilet may sit close to the basin and shower so the fixtures can connect efficiently to the main drain and vent stack. This saves space and makes the bathroom easier to plan.
A toilet-only layout, such as a powder room, may show just the toilet drain, water supply, shutoff valve, vent, and hand basin plumbing. Even in a small room, proper venting and drain slope are still important.
In renovations, a diagram can help decide whether a toilet can stay in the same location or should be moved. Moving a toilet is often more complex than moving a vanity because the toilet needs a larger drain connection, proper slope, flange alignment, and venting.
How to Read a Toilet Plumbing Diagram
Start with the water supply. Look for the shutoff valve, supply connector, fill valve, and tank. These parts show how clean water enters the toilet.
Next, look at the tank parts. Find the flush handle, chain, flapper, flush valve, overflow tube, float, and fill valve. These parts control flushing and refilling.
Then follow the waste path. Start at the bowl, move through the trapway, then down through the floor flange and into the drainpipe. From there, the waste line connects to the larger drain or sewer line.
Finally, check the vent. The vent line usually rises upward and connects to a vent stack or roof vent. This part helps air enter the system and prevents suction problems.
Once you understand these four areas — supply, tank, drain, and vent — most toilet diagrams become much easier to read.
Common Problems a Diagram Can Help Explain
A running toilet often means water is leaking from the tank into the bowl or the fill valve is not shutting off. The flapper may be worn, the chain may be too tight, or the water level may be too high.
A weak flush may happen when the tank does not fill enough, the flapper closes too soon, the rim holes are clogged, or the drain path is partly blocked.
A toilet that gurgles may point to a venting issue or a clog deeper in the drain system. If other fixtures are also slow, the problem may involve the main drain line.
A leak around the toilet base may mean the wax ring or seal has failed. It may also mean the toilet flange is cracked, loose, or set at the wrong height.
A sewer smell near the toilet may come from a failed seal, dry trap, vent problem, or drain issue. This should not be ignored, especially if the smell keeps returning.
A clog may be close to the toilet, or it may be farther down the pipe. A simple toilet auger can clear some clogs, but repeated backups may need professional drain inspection.
DIY Checks Homeowners Can Safely Do
Some simple checks are usually safe for homeowners. You can make sure the shutoff valve works. You can inspect the supply line for drips. You can remove the tank lid and check whether the flapper seals properly. You can also listen for running water after the tank should be full.
You can test for a silent leak by adding a few drops of food coloring to the tank and waiting. If color appears in the bowl without flushing, the flapper or flush valve seal may be leaking.
You can also check whether the toilet rocks. A toilet should sit firmly on the floor. If it moves, the seal at the base may be at risk. Do not keep using a loose toilet without addressing it, because movement can damage the wax ring and cause leaks.
However, not all toilet plumbing work is DIY-friendly. Work involving drain relocation, vent changes, major leaks, sewer backups, or code compliance should be handled by a licensed plumber.
When to Call a Plumber
Call a plumber if the toilet backs up repeatedly, smells like sewage, leaks at the base, gurgles with other fixtures, or does not flush even after basic plunging. You should also call a professional if water is leaking near electrical areas, if the floor around the toilet feels soft, or if you suspect a damaged drainpipe.
A plumber may use a camera inspection to check for roots, cracks, offsets, bellies, or blockages in the pipe. For heavy buildup or recurring main-line clogs, hydro jetting may be recommended because it can clean the pipe walls more thoroughly than a standard cable snake.
For new installations, remodels, or toilet relocation, a plumber can confirm the correct drain size, slope, venting, flange placement, and local code requirements. Plumbing rules vary by region, so professional advice is important.
Why a Toilet Plumbing Diagram Matters During Renovation
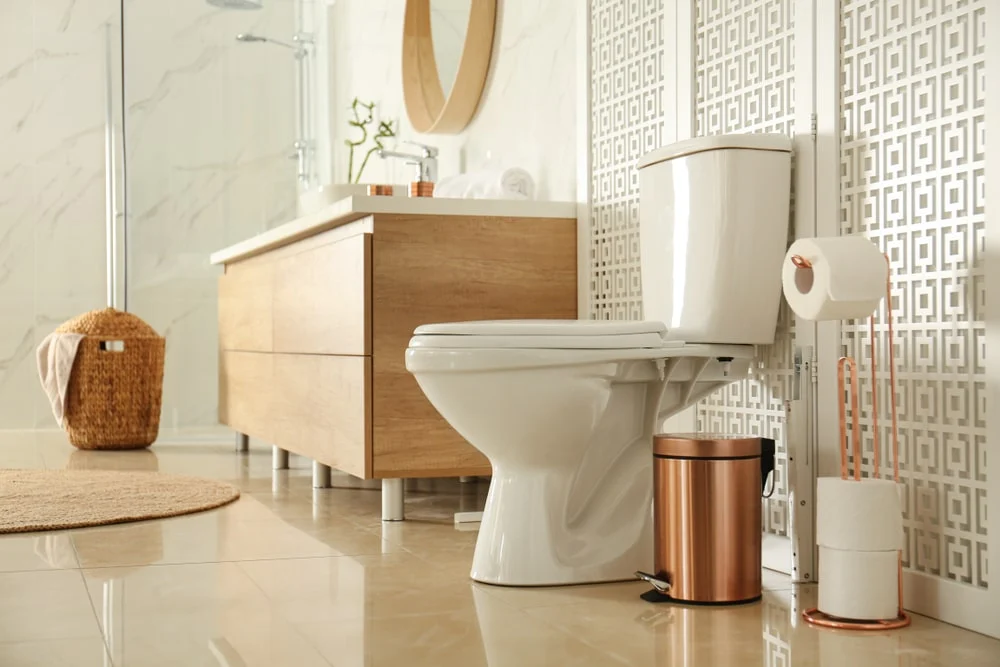
During a bathroom remodel, a diagram is more than a picture. It is a planning tool. It helps show where the toilet will sit, how far it is from the wall, where the drain goes, where the water supply comes from, and how the vent connects.
A diagram can also prevent expensive surprises. For example, moving a toilet across the room may seem simple on the surface, but it can require cutting floors, rerouting drains, adjusting slope, adding or moving vents, and repairing finished surfaces. A clear plan helps avoid mistakes before work begins.
For small bathrooms, a diagram helps place fixtures along a shared plumbing wall. This can save space and reduce pipe complexity. For larger bathrooms, it helps make sure each fixture has proper drainage and venting.
A toilet plumbing diagram also helps homeowners communicate with contractors. Instead of saying “the toilet pipe goes somewhere under the floor,” you can point to the supply line, flange, drain, trapway, or vent and explain the issue more clearly.
Simple Toilet Plumbing Diagram Checklist
A useful toilet diagram should show the water supply line, shutoff valve, tank, fill valve, flush valve, flapper, overflow tube, bowl, trapway, floor flange, wax ring or seal, drainpipe, and vent pipe.
For a remodel or installation, it should also show fixture spacing, wall distance, drain route, pipe slope, and connection to the main sewer or septic line. In areas with strict plumbing codes, the diagram should also support local compliance requirements.
The more complete the diagram is, the easier it becomes to understand the system. A simple homeowner diagram is enough for basic learning. A licensed plumber or builder may need a more detailed technical drawing for construction.
FAQs About Toilet Plumbing Diagram
A toilet plumbing diagram shows how a toilet connects to the water supply, tank parts, bowl, floor flange, drainpipe, and vent system. It helps explain how clean water enters the toilet and how wastewater leaves after flushing.
The main parts include the shutoff valve, supply line, fill valve, float, flush handle, chain, flapper, flush valve, overflow tube, bowl, trapway, wax ring, toilet flange, drainpipe, and vent pipe.
A toilet may keep running because the flapper is worn, the chain is too tight, the fill valve is faulty, or the tank water level is too high. These parts are usually shown inside the tank section of a toilet diagram.
A gurgling toilet may be caused by a clog, blocked vent, poor pipe slope, or a deeper drain problem. If the gurgling happens when other fixtures drain, the issue may be in the main drain or vent system.
Some minor toilet repairs are DIY-friendly, such as replacing a flapper or supply line. However, installing or moving toilet plumbing usually requires a licensed plumber because drain size, slope, venting, sealing, and local code rules must be correct.
Conclusion
A toilet plumbing diagram makes toilet plumbing easier to understand because it breaks the system into clear parts. The tank stores clean water, the bowl directs waste into the drain, the flapper starts the flush, the fill valve refills the tank, the flange connects the toilet to the floor drain, and the vent helps the whole system breathe.
For everyday homeowners, this knowledge can help with simple troubleshooting. It can also make conversations with plumbers clearer and more productive. Still, toilets are connected to a larger drainage and venting system, so serious problems should not be ignored.
If the issue is a simple running toilet, the cause may be inside the tank. If the issue is gurgling, sewage odor, repeated clogging, or leaking at the floor, the problem may be deeper in the plumbing system. A diagram helps you understand the difference.