
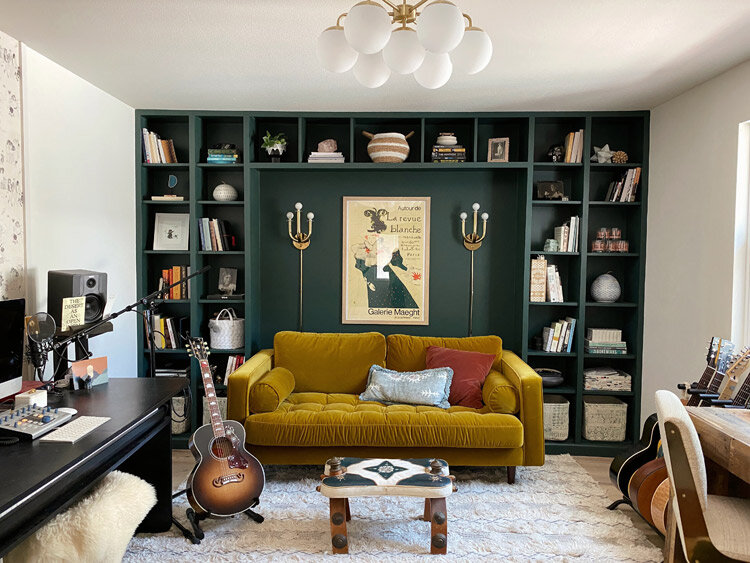
A DIY bookshelf lets you create practical book storage that fits your room, collection, budget, and decorating style. You can build a traditional wooden bookcase, install wall-mounted ledges, stack wooden crates, customize a flat-pack unit, or create an entire built-in library wall.
However, a bookshelf must do more than look attractive. Books are heavy, long shelves can sag, and tall furniture can tip if it is not secured correctly. Good planning, suitable materials, strong joints, and proper wall attachment are therefore essential.
This guide explains how to build a beginner-friendly freestanding wooden bookshelf. It also covers bookshelf dimensions, materials, shelf sag, wall anchoring, easy no-tool alternatives, children’s designs, styling ideas, common mistakes, and frequently asked questions.
DIY Bookshelf Project Overview
The main project in this guide creates a simple wooden bookcase with adjustable shelves, a plywood back, and two reinforcing stretchers.
| Project detail | Information |
| Skill level | Beginner to intermediate |
| Active building time | Approximately 4–6 hours |
| Finish time | Depends on paint, stain, or clear coat |
| Finished width | Approximately 32 inches |
| Finished height | Approximately 48 inches |
| Finished depth | Approximately 11¼ inches |
| Main material | Nominal 1×12 pine |
| Shelf type | Adjustable |
| Suggested shelves | Three |
| Back panel | ¼-inch plywood |
| Main safety step | Secure the bookshelf to the wall |
The final cost depends on local lumber prices, hardware, finish, and the tools you already own. Check current prices before creating a project budget.
Why Build a DIY Bookshelf?
Building your own bookshelf provides several advantages over buying a standard bookcase.
Custom dimensions
Store-bought shelves may be too wide, too shallow, or too tall for the available space. A custom design can fit beside a window, between two doors, beneath a sloped ceiling, or inside an unused alcove.
Better material choices
Many inexpensive bookcases use thin particleboard or lightweight plastic components. A homemade bookshelf allows you to choose solid wood, furniture-grade plywood, reinforced MDF, or another material suited to the expected load.
Flexible storage
Adjustable shelves can accommodate novels, textbooks, baskets, photo albums, records, plants, and decorative objects. Fixed shelves provide greater rigidity but cannot be rearranged easily.
Personal style
A DIY bookshelf can support almost any decorating style, including:
- Modern
- Rustic
- Industrial
- Farmhouse
- Mid-century
- Japandi
- Bohemian
- Traditional
- Minimalist
- Children’s themes
You can control the wood species, paint color, stain, hardware, trim, shelf arrangement, and decorative details.
Choosing the Right DIY Bookshelf Type
Before cutting lumber, decide what type of bookshelf meets your needs.
| Bookshelf type | Difficulty | Best use |
| Crate bookshelf | Easy | Temporary or flexible storage |
| Modular cube shelf | Easy | Toys, clothing, décor, and light books |
| Book ledges | Easy | Children’s books and display storage |
| Wall-mounted shelves | Easy–Intermediate | Small spaces and decorative collections |
| Freestanding bookcase | Intermediate | General book storage |
| Ladder bookshelf | Intermediate | Plants, décor, and lighter books |
| Industrial pipe shelf | Intermediate | Rustic or industrial rooms |
| Built-in bookshelf | Advanced | Permanent wall-to-wall storage |
| Rotating bookshelf | Intermediate–Advanced | Corners and compact rooms |
| Children’s themed shelf | Varies | Nurseries, bedrooms, and classrooms |
Retail listings often use “DIY bookshelf” to describe ready-to-assemble or tool-free storage. A modular cube organizer may be convenient, but it is different from a bookcase built from raw lumber.
Always check whether a product is intended for heavy books, light décor, clothing, toys, or general household storage.
How to Plan a DIY Bookshelf
Careful planning prevents wasted lumber, incorrect shelf spacing, unstable proportions, and frustrating assembly problems.
Measure the room
Measure the height, width, and depth of the intended location. Take measurements at several points because floors and walls may not be perfectly level or square.
Account for:
- Baseboards
- Door swings
- Window trim
- Electrical outlets
- Heating vents
- Light switches
- Floor transitions
- Nearby furniture
- Access to wall studs
Leave enough space to move the finished bookshelf into position.
Measure your books
Standard novels may fit comfortably on shelves spaced 10 to 12 inches apart. Large reference books, binders, records, and art books may require more height or depth.
Measure the tallest and deepest items you plan to store before choosing shelf dimensions.
Choose a shelf depth
A shelf depth of approximately 10 to 12 inches works for many books.
Consider deeper shelves for:
- Large art books
- Storage baskets
- Vinyl records
- Board games
- Printers
- Oversized albums
Very deep shelves may waste space behind smaller books. They can also make a narrow room feel crowded.
Decide between adjustable and fixed shelves
Adjustable shelves rest on removable shelf pins. They are easy to reposition and work well when storage needs may change.
Fixed shelves are attached permanently to the side panels. They strengthen the case and reduce side-to-side movement, but their spacing cannot be changed.
This project uses adjustable shelves and relies on a plywood back and stretchers for stability.
Sketch the design
Your drawing should show:
- Overall width
- Overall height
- Shelf depth
- Board thickness
- Shelf positions
- Back-panel dimensions
- Base design
- Stretcher positions
- Wall-attachment points
A rough hand sketch is sufficient. You can also use woodworking design software to create cut lists, diagrams, and three-dimensional views.
Best Materials for a DIY Bookshelf
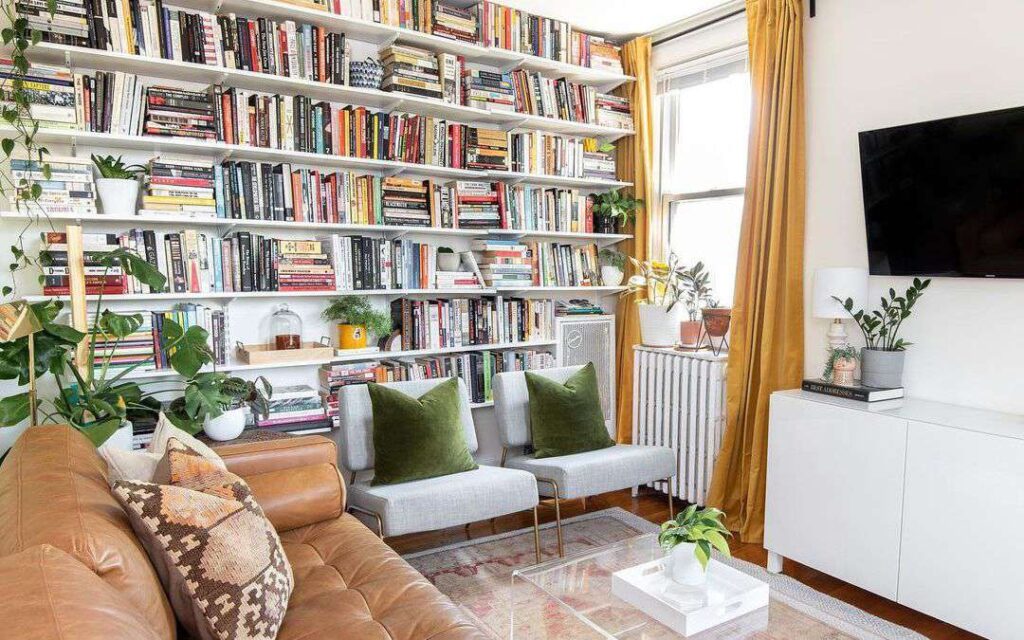
Different materials offer different levels of strength, cost, weight, and finish quality.
Pine
Pine is a practical choice for a beginner DIY bookshelf. It is widely available, easy to cut, and suitable for paint or stain.
Nominal 1×12 pine is not actually 1 inch by 12 inches. Its finished dimensions are usually close to ¾ inch thick and 11¼ inches wide.
Inspect every board for:
- Twisting
- Bowing
- Cupping
- Deep cracks
- Loose knots
- Damaged edges
Slight imperfections can add rustic character, but badly warped boards make assembly difficult.
Plywood
Furniture-grade plywood is strong and dimensionally stable. It is suitable for shelves, bookcase sides, built-ins, and painted furniture.
Exposed plywood edges may need:
- Edge banding
- Solid-wood trim
- A face frame
- Filler and paint
Thin plywood is also useful for the back panel. A well-attached back helps square and stiffen the bookcase.
MDF
Medium-density fiberboard has a smooth surface that accepts paint well. However, it is heavy and vulnerable to moisture.
Long MDF shelves may sag under books unless they are thick, reinforced, or supported at shorter intervals.
Particleboard
Particleboard is common in inexpensive flat-pack furniture. It is affordable and relatively flat but does not hold screws as well as solid wood or quality plywood.
It can also swell when exposed to moisture.
Solid hardwood
Oak, maple, cherry, walnut, and other hardwoods can produce attractive, durable furniture. However, they are more expensive and may be harder for beginners to cut and finish.
Plastic, fabric, and wire systems
Tool-free cube shelves are lightweight and easy to rearrange. They may work well for toys, clothes, décor, and paperbacks.
Do not assume they can support dense rows of textbooks. Verify the load rating for each shelf or cube.
DIY Bookshelf Cut List
This example creates a bookshelf approximately 32 inches wide, 48 inches tall, and 11¼ inches deep.
| Part | Material | Quantity | Cut size |
| Side panels | 1×12 pine | 2 | 47¼ inches |
| Top panel | 1×12 pine | 1 | 32 inches |
| Bottom panel | 1×12 pine | 1 | 30½ inches |
| Adjustable shelves | 1×12 pine | 3 | Cut to actual interior width |
| Upper stretcher | 1×4 pine | 1 | 30½ inches |
| Lower stretcher | 1×4 pine | 1 | 30½ inches |
| Back panel | ¼-inch plywood | 1 | Fit to assembled case |
Do not cut all adjustable shelves to their final length before assembling the outer frame.
Actual lumber thickness, screw alignment, and minor assembly differences may change the inside width. Measure the completed opening and cut a test shelf before cutting the others.
DIY Bookshelf Materials
You will need approximately:
- Three 8-foot 1×12 pine boards
- One 8-foot 1×4 pine board
- One ¼-inch plywood panel large enough for the back
- Wood glue
- 2-inch wood screws
- 1-inch screws, nails, or suitable fasteners for the back
- Short screws for attaching the back to the stretchers
- Shelf pins
- Wall-anchoring screws or anti-tip hardware
- Wood filler
- Sandpaper
- Primer and paint, or stain and clear finish
The exact quantity depends on board defects, saw kerf, mistakes, and the number of shelves.
Tools for Building a DIY Bookshelf
Useful tools include:
- Tape measure
- Pencil
- Carpenter’s square
- Level
- Circular saw, miter saw, or table saw
- Drill/driver
- Drill bits
- Countersink bit
- Shelf-pin jig
- Clamps
- Random-orbit sander or sanding block
- Stud finder
- Straightedge or saw guide
- Safety glasses
- Hearing protection
- Dust mask or respirator
Equivalent tools from any reliable manufacturer can complete the project. A specific tool brand is not required.
Before You Start Building
Inspect and acclimate the lumber
Bring the lumber into the project area and allow it to adjust to the indoor environment when practical. Inspect the boards again before cutting.
Confirm actual dimensions
Measure the real thickness and width of every board. Nominal dimensions are labels, not exact measurements.
Identify the inside faces
Choose which side of each board will face inward and which side will remain visible. Mark them lightly with a pencil.
Review finish instructions
Paints, stains, lacquers, and clear coats have different ventilation, drying, recoat, and safety requirements.
Follow the manufacturer’s label. Work away from flames, sparks, and poorly ventilated spaces.
How to Build a DIY Bookshelf
Step 1: Cut the side, top, bottom, and stretcher pieces
Measure and mark each piece carefully.
Use a square to draw straight cut lines. When cutting with a circular saw, support the boards fully and use a clamped straightedge when necessary.
Cut:
- Two side panels at 47¼ inches
- One top at 32 inches
- One bottom at 30½ inches
- Two stretchers at 30½ inches
Leave the adjustable shelves slightly oversized or uncut until the case is assembled.
Step 2: Mark the bottom-panel position
Place both side panels together with their bottom ends aligned.
Mark a line approximately 2 to 2½ inches above the bottom of each side. The bottom panel will sit above this line, leaving a small open base beneath the lowest shelf.
This detail keeps books away from the floor and gives the bookcase a more finished appearance.
Step 3: Lay out the shelf-pin holes
Place the side panels with their inside faces upward.
Mark two vertical rows on each panel:
- One row near the front edge
- One row near the back edge
Keep each row the same distance from its nearest edge. A distance of about 1½ to 2 inches often works well.
Space the holes at consistent vertical intervals, such as 1 or 2 inches.
A shelf-pin jig is the easiest way to create matching holes. Confirm the diameter of your shelf pins before selecting the drill bit. Common systems include 5-millimeter and ¼-inch hardware.
Do not assume all pins require the same hole size.
Step 4: Control the drilling depth
Shelf-pin holes should not pass through the side panels.
Use:
- A stop collar
- A shelf-pin jig with depth control
- Tape wrapped around the drill bit
Test the setup on scrap wood first.
Step 5: Drill pilot holes
Mark the screw locations for the top, bottom, and stretchers.
Drill pilot holes slightly smaller than the screw’s main shaft. Pilot holes reduce splitting while allowing the screw threads to grip.
Countersink the screw heads when you plan to fill and paint them.
Step 6: Dry-fit the outer frame
Position the top across the ends of the side panels. Fit the bottom panel between the sides at the marked height.
Clamp the pieces together without glue and check:
- Overall width
- Bottom-panel alignment
- Corner squareness
- Visible board faces
- Shelf-pin orientation
Correct any mistakes before permanent assembly.
Step 7: Glue and screw the case together
Apply a thin, even layer of wood glue to each joint.
Clamp the pieces in position and drive the screws through the pilot holes. Avoid overtightening, which can strip the wood or pull the case out of square.
Wipe away visible glue before it dries, especially when using stain.
Step 8: Square the bookshelf
Measure diagonally from the upper-left corner to the lower-right corner.
Then measure from the upper-right corner to the lower-left corner.
The two diagonal measurements should match. Push or pull the frame gently until it is square.
Check the corners with a carpenter’s square as well.
Step 9: Install the stretchers
Position one stretcher near the top rear of the bookcase and one near the bottom rear.
The stretchers help:
- Strengthen the frame
- Reduce sideways movement
- Support the back panel
- Provide solid wall-attachment points
Attach them with glue and screws through the side panels.
Step 10: Attach the plywood back
Measure the assembled frame and cut the plywood back to fit.
Place the back on the case while it is still square. Align the edges and secure it around the perimeter and into the stretchers.
Use suitable screws, nails, or staples. Space the fasteners consistently.
The back panel is structural. It helps prevent the bookcase from leaning or racking from side to side.
Step 11: Measure and cut the shelves
Measure the interior width between the side panels in several locations.
Use the smallest measurement and subtract a small amount for clearance. The shelves should slide into place without binding but should not be short enough to slip off the pins.
Cut one shelf first and test it. Then use it as the template for the remaining shelves.
Step 12: Sand the bookshelf
Begin with approximately 100- or 120-grit sandpaper to remove saw marks, pencil lines, and rough areas.
Continue with a finer grit according to the finish manufacturer’s instructions.
Lightly soften sharp exposed edges. Remove all dust before painting or staining.
Step 13: Fill visible screw holes
Apply wood filler to countersunk screw holes, dents, or unwanted gaps.
Let the filler dry completely, then sand it flush.
Choose filler that is compatible with your intended paint or stain.
Step 14: Apply paint or stain
Painting the bookshelf
For a painted finish:
- Clean off all dust.
- Apply a suitable primer.
- Sand lightly when recommended.
- Apply two thin paint coats.
- Allow proper drying and curing time.
Paint is useful when you want a uniform finish or need to conceal filler and lower-grade wood.
Staining the bookshelf
For a stained finish:
- Sand evenly.
- Remove all glue residue.
- Test the stain on scrap wood.
- Apply stain according to the label.
- Allow it to dry.
- Add a compatible protective clear coat.
Stain highlights scratches, sanding marks, filler, and uneven absorption. Surface preparation matters.
Step 15: Install the adjustable shelves
Insert four shelf pins at equal heights.
Place each shelf on the pins and confirm that all four corners are supported. Adjust the spacing according to your books and storage items.
Step 16: Secure the DIY bookshelf to the wall
Move the finished unit into position and use a level to check it.
Locate wall studs when possible. Pass structural screws through the solid stretchers or use a properly rated anti-tip system.
Do not rely only on thin plywood when attaching a heavy bookshelf to the wall.
How to Prevent DIY Bookshelf Sag
Shelf sag is one of the most common bookshelf problems.
Books create a concentrated, long-term load. A shelf may look straight at first but bend gradually over time.
Sag depends on:
- Shelf length
- Material
- Thickness
- Depth
- Weight
- Support placement
- Edge reinforcement
A ¾-inch wooden shelf carrying books may require reinforcement when the unsupported span approaches 30 to 32 inches.
Ways to strengthen bookshelf shelves
- Shorten the unsupported span
- Add a center divider
- Use thicker lumber
- Use high-quality plywood
- Add a solid-wood front edge
- Install a support strip beneath the shelf
- Use fixed shelves at strategic heights
- Reduce the number of heavy books on one shelf
Adding a deeper front edge can increase stiffness because it makes the shelf structurally taller.
DIY Bookshelf Wall-Anchoring Safety
Freestanding bookshelves can tip when:
- A child climbs on them
- Several drawers or shelves are pulled outward
- Heavy items are stored near the top
- The floor is uneven
- Someone bumps the unit
- A pet jumps onto it
- The furniture has a narrow base
Wall attachment is especially important for tall, narrow, ladder-style, rotating, and children’s bookcases.
Choose anchors for the wall type
Possible wall constructions include:
- Wood studs with drywall
- Metal studs
- Plaster and lath
- Brick
- Concrete
- Hollow masonry block
Fasteners must match the wall material, furniture weight, and expected forces.
When possible, attach the bookshelf to wood studs through a solid stretcher. Use rated anchors when studs are unavailable and the wall system permits them.
Place heavy books low
Store textbooks, encyclopedias, records, and large albums on lower shelves.
Keeping weight near the floor lowers the center of gravity and improves stability.
Check for hidden utilities
Before drilling into a wall, consider the possible location of:
- Electrical cables
- Water pipes
- Drain lines
- Gas lines
- Heating components
Use suitable detection tools and professional help when the wall location is uncertain.
Easy DIY Bookshelf Ideas
A full wooden bookcase is only one option. Simpler designs can provide effective storage with fewer tools.
1. Wooden crate bookshelf
Sand, paint, or stain wooden crates and arrange them vertically or horizontally.
Fasten neighboring crates together. Secure taller arrangements to the wall.
Crates are useful for:
- Children’s books
- Shoes
- Toys
- Baskets
- Small collections
2. Wood-and-block bookshelf
Place sturdy boards across concrete blocks or decorative masonry units.
This design requires few tools and can be rearranged easily. However, the boards must be thick enough for the span and load.
Use flat, stable blocks and prevent the boards from sliding.
3. Wall-mounted book ledges
Book ledges hold books with their covers facing forward. They work especially well in nurseries and children’s rooms.
Use appropriate fasteners and avoid installing heavy shelves where children can pull on them.
4. Modular cube organizer
Cube systems can be stacked and reconfigured. They may include wire frames, plastic panels, fabric shelves, engineered wood, or bamboo.
Check:
- Cube dimensions
- Load capacity
- Connector quality
- Anti-tip hardware
- Compatibility with storage bins
Lightweight units may not be suitable for heavy book collections.
5. Industrial pipe bookshelf
Pipe shelves combine metal fittings with wooden boards.
Some retail kits include only the pipe hardware. Confirm whether shelves, mounting screws, anchors, and boards are included.
6. Ladder bookshelf
A ladder bookcase has wider lower shelves and narrower upper shelves.
It creates an open appearance but may be less stable than a deep rectangular bookcase. Secure it to the wall.
7. Floating bookshelves
Floating shelves hide their brackets inside or behind the shelf.
They create a minimalist appearance but require strong mounting hardware and accurate installation.
Verify the bracket’s load rating and attach it to suitable structural support.
8. Built-in bookshelf
Built-ins can fill an alcove, wall, or unused corner.
Because walls and floors are rarely perfectly square, each section may need to be measured and fitted individually.
Built-ins may also require:
- Baseboard removal
- Scribing
- Face frames
- Trim
- Electrical planning
- Caulking
- Professional installation
9. IKEA or flat-pack bookshelf makeover
A standard bookcase can be customized with:
- Paint
- Wallpaper backing
- Furniture legs
- Trim
- Doors
- Baskets
- New hardware
- Integrated lighting
Consider how added doors, trim, and accessories affect the furniture’s balance and wall attachment.
10. Children’s themed bookshelf
Popular shapes include:
- Houses
- Trees
- Rockets
- Dollhouses
- Clouds
- Animals
Children’s furniture should have rounded edges, strong joints, non-toxic finishes, and reliable anti-tip restraint.
Avoid small removable parts within reach of young children.
11. Rope shelf
A small board suspended from rope can hold a few lightweight books or decorative items.
This design is decorative rather than suitable for a large book collection. Use reliable knots, rated ceiling or wall hardware, and appropriate weight limits.
12. Bed-frame bookshelf
A narrow shelf built beside or behind a bed can use an awkward gap.
Check that it does not interfere with bedding, electrical outlets, emergency access, or safe movement around the room.
DIY Bookshelf Design Ideas by Style
Modern DIY bookshelf
Use:
- Straight lines
- Smooth painted surfaces
- White, black, or neutral finishes
- Minimal trim
- Hidden fasteners
- Open space between objects
Rustic bookshelf
Choose:
- Pine or reclaimed wood
- Visible grain
- Dark stain
- Distressed finishes
- Black metal hardware
Industrial bookshelf
Combine:
- Metal pipe
- Dark steel frames
- Thick wood shelves
- Exposed fasteners
- Rustic brown or black finishes
Japandi bookshelf
Use:
- Light natural wood
- Simple proportions
- Warm neutral tones
- Limited decoration
- Functional storage baskets
A Japandi bookshelf should feel calm and uncluttered rather than completely empty.
Boho bookshelf
Mix:
- Plants
- Woven baskets
- Natural wood
- Colorful books
- Handmade pottery
- Personal objects
For more styling ideas, connect this section to your guides about decorating a room, Japandi living rooms, and Boho living rooms.
Mid-century bookshelf
Consider:
- Tapered legs
- Warm wood tones
- Clean rectangular shapes
- Open backs
- Sliding or hinged cabinet doors
Added legs can make a bookshelf less stable, so use suitable attachment plates and wall restraint.
How to Style a DIY Bookshelf
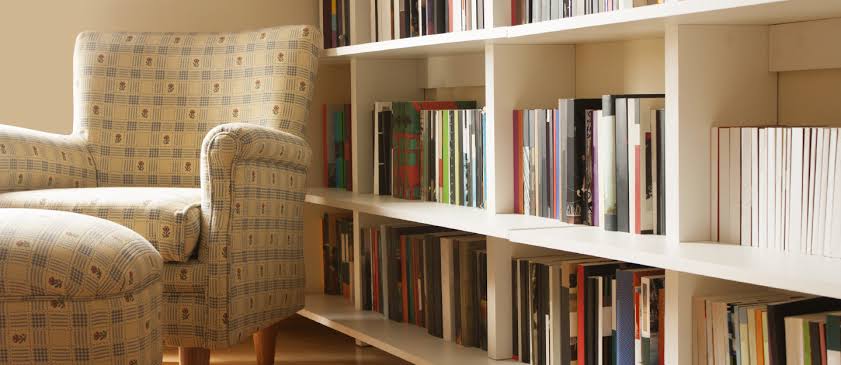
A bookshelf should remain functional after it is decorated.
Arrange books by purpose
You can organize books by:
- Author
- Subject
- Genre
- Height
- Color
- Frequency of use
Frequently used books should remain within easy reach.
Mix vertical and horizontal arrangements
Place most books vertically, then add a few horizontal stacks to vary the visual rhythm.
Do not create unstable stacks that can fall.
Add decorative objects
Suitable items include:
- Plants
- Framed photographs
- Small artwork
- Vases
- Baskets
- Sculptures
- Bookends
- Storage boxes
Avoid filling every inch. Open space makes the display easier to view and clean.
Add bookshelf lighting
LED strips, rechargeable picture lights, or small integrated fixtures can highlight books and decorative objects.
Keep electrical cables organized and follow the lighting manufacturer’s clearance and installation instructions.
Do not place hot lamps against books or finished wood.
Common DIY Bookshelf Mistakes
Building without a plan
An inspiration image does not provide reliable measurements, material thicknesses, or structural details.
Create a drawing and cut list first.
Ignoring actual lumber dimensions
A nominal 1×12 board is smaller than 1 inch by 12 inches. Incorrect assumptions can change the final width and shelf fit.
Cutting every shelf too early
Measure the completed interior before cutting adjustable shelves.
Using long unsupported shelves
Long shelves may sag under books. Add reinforcement or reduce the span.
Forgetting structural support
An open rectangular frame can lean sideways without:
- A plywood back
- Fixed shelves
- Stretchers
- Diagonal braces
Using unsuitable fasteners
Small finishing nails are not a substitute for structural screws where strong joints are required.
Using the wrong wall anchors
Choose anchors based on the wall material and expected load, not convenience.
Skipping pilot holes
Driving screws near board ends without pilot holes can split the wood.
Rushing the finish
Paint and clear coats may feel dry before they have cured fully.
Placing books on uncured shelves can leave marks or cause covers to stick.
Loading lightweight cubes with heavy books
Fabric, plastic-panel, and connector shelves may be designed for clothes or toys rather than dense book collections.
Check the specifications.
DIY Bookshelf Maintenance
Inspect the bookshelf periodically for:
- Loose screws
- Failed wall anchors
- Bent shelf pins
- Sagging shelves
- Separating joints
- Water damage
- Peeling finish
- Unstable feet
- Cracked connectors
- Mold or moisture
Tighten hardware and repair damage before adding more weight.
Clean painted or finished shelves with a slightly damp cloth unless the finish manufacturer recommends another method. Avoid soaking wood, MDF, or particleboard.
How This DIY Bookshelf Guide Was Developed
This guide combines general planning principles, branded woodworking instructions, consumer product patterns, and bookshelf design inspiration.
The construction sequence reflects established cabinet and bookcase practices such as:
- Measuring before cutting
- Using pilot holes
- Checking diagonal squareness
- Installing a structural back
- Reinforcing long shelves
- Cutting adjustable shelves after assembly
- Securing tall furniture to the wall
Project dimensions should always be verified against the actual lumber, hardware, room, and intended load before construction begins.
DIY Bookshelf FAQs
A wooden crate bookshelf, modular cube system, or simple wall-mounted book ledge is usually easiest. These options require fewer cuts and less complicated joinery than a complete wooden bookcase.
Pine is an accessible beginner option. Furniture-grade plywood is strong and stable, while hardwood offers greater durability at a higher cost. MDF works well for painted furniture but requires reinforcement on long shelves.
A depth of approximately 10 to 12 inches works for most novels and standard hardcovers. Measure your largest books, baskets, records, or storage boxes before deciding.
Many compact bookcases are between 24 and 36 inches wide. Wider shelves require thicker material, edge reinforcement, or center support to reduce sag.
The answer depends on material, thickness, depth, and load. A ¾-inch shelf carrying books may need reinforcement when the unsupported span approaches 30 to 32 inches.
A low bookcase may be 30 to 36 inches tall, while a standard freestanding unit may be 48 to 72 inches tall. Taller units require greater attention to base stability and wall anchoring.
A back panel helps keep the case square and prevents sideways movement. Open-backed bookcases require another form of structural bracing.
Tall, narrow, freestanding, ladder-style, and children’s bookcases should be secured to the wall. Wall restraint is also advisable in homes with pets or uneven floors.
Yes. You can use precut boards, wooden crates, modular cubes, or simple hand-tool designs. Some home-improvement stores also provide basic cutting services.
Yes. Furniture-grade plywood is strong and stable. Cover exposed edges with edge banding, trim, or a face frame when you want a finished furniture appearance.
MDF can be used, especially for painted units, but long MDF shelves may sag under books. Use thicker panels, shorter spans, front-edge reinforcement, or center supports.
Reduce the span, use thicker material, add a center divider, install a support beneath the shelf, or attach a solid-wood strip to the front edge.
It can be safe when the crates are strong, fastened together, placed on a stable surface, and secured to the wall when stacked vertically.
Some are suitable for books, while others are designed mainly for clothing, toys, or décor. Check the stated load limit and material construction.
It may be cheaper when you already own the tools and choose affordable materials. However, lumber, hardware, finish, tool purchases, and mistakes can make a one-off project more expensive than a basic flat-pack bookcase.
Paint creates a uniform surface and hides filler more effectively. Stain highlights natural wood grain but requires more consistent sanding and glue cleanup.
Most projects need primer and two thin finish coats, although the exact system depends on the paint, wood, and desired appearance. Follow the product instructions.
Drying and curing times vary widely. Do not load the shelves until the finish manufacturer says the coating is ready for normal use.
Place heavy books on the lowest shelves. This improves stability and reduces tipping risk.
Extend the unit to the wall, add matching baseboard and crown trim, cover gaps with filler strips, install a face frame, and paint the shelves to coordinate with the wall. Keep ventilation, wiring, and wall access in mind.
Final Thoughts on Building a DIY Bookshelf
A successful DIY bookshelf begins with accurate measurements, suitable materials, and realistic expectations about weight.
Beginners may prefer crates, book ledges, modular cubes, or a compact pine bookcase. Experienced builders can explore built-ins, cabinets, face frames, lighting, hardwood shelves, and custom trim.
Whatever design you choose, do not overlook structural safety. Keep shelf spans reasonable, square the frame before installing the back, attach fasteners to solid material, place heavy books low, and secure freestanding furniture to the wall.
With careful planning, a homemade bookshelf can provide practical storage while becoming a lasting part of your room’s design.