
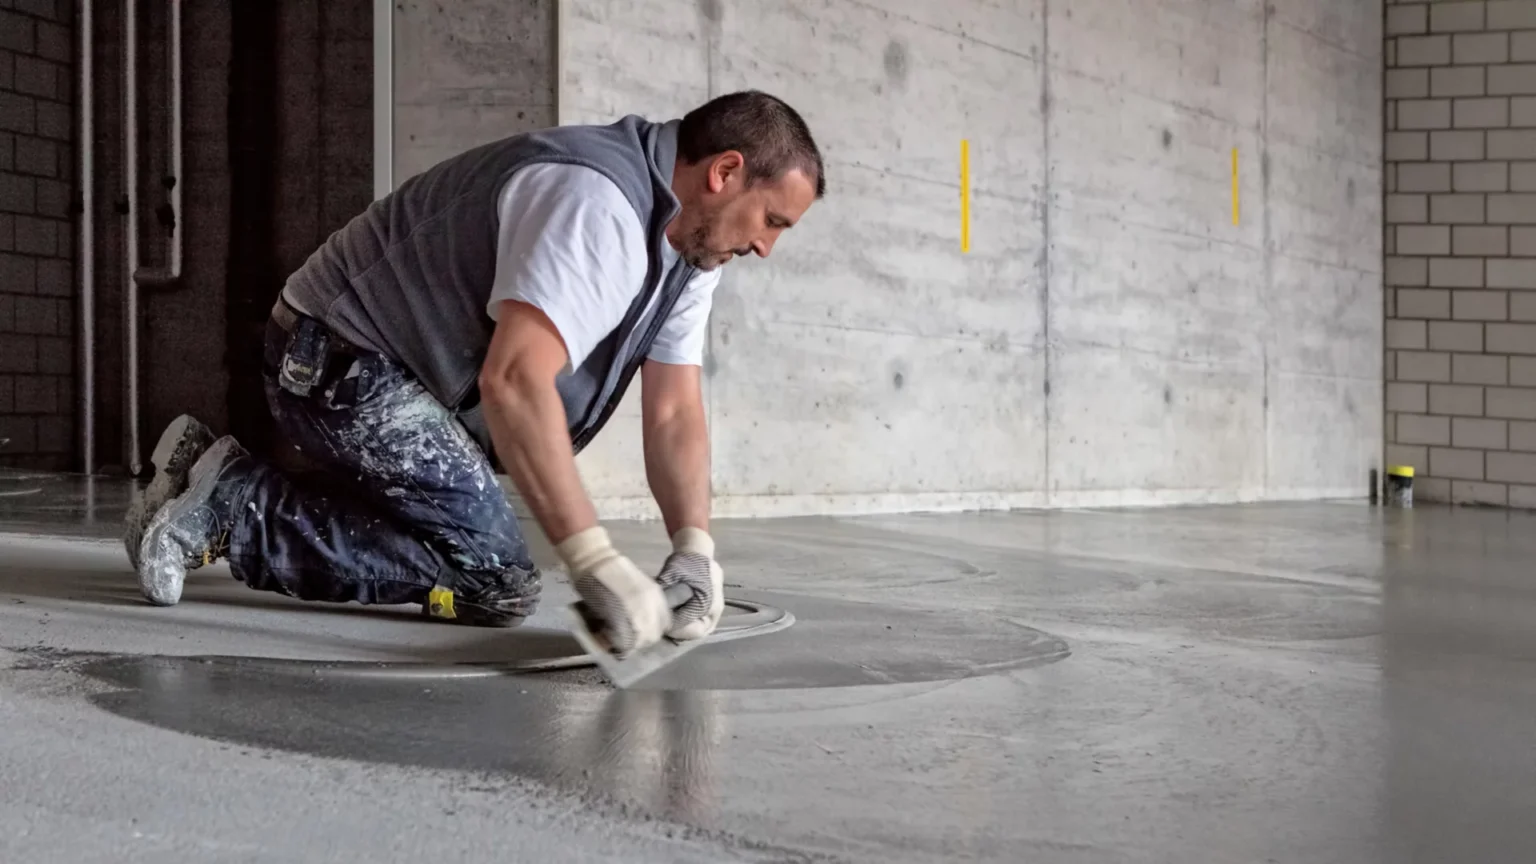
Floor leveling compound creates a flat, smooth, and stable base before vinyl, laminate, tile, carpet, engineered wood, or another floor covering is installed. It can fill low spots, smooth rough concrete, repair shallow damage, and reduce uneven transitions. However, it cannot repair rotten plywood, moving joists, foundation settlement, active cracks, or other structural defects.
A successful result depends on more than pouring material across the floor. First, you must identify why the surface is uneven. Next, you need a compound approved for the substrate and finished flooring. Finally, you must prepare, prime, mix, apply, and cure the product according to its current technical data sheet.
This guide explains the different types of floor levelers, suitable substrates, preparation methods, application steps, drying times, safety concerns, common failures, and flooring-specific requirements.
What Is Floor Leveling Compound?
Floor leveling compound is a cement-based, gypsum-based, or polymer-modified material used to flatten and smooth a subfloor. Most cement-based products arrive as dry powder and must be mixed with a carefully measured amount of water or a manufacturer-approved liquid additive.
Once mixed, the compound may become fluid enough to flow across a broad area. Alternatively, it may remain thick enough to shape with a trowel.
The general product category includes:
- Self-leveling underlayment
- Trowel-applied floor patch
- Feather-finish compound
- Skim-coating material
- Deep-fill leveler
- Ramping compound
- Gypsum-based underlayment
- Self-leveling topping
Although these products perform related tasks, they are not interchangeable. For example, a skim coat may smooth shallow scratches but may not be suitable for a deep depression. Similarly, an interior self-leveler should not be used outside unless the manufacturer expressly approves exterior exposure.
How Does Floor Leveling Compound Work?
A fluid self-leveling product spreads across a properly prepared surface and moves into low areas. Gravity helps the material settle, while its formulation allows it to flow more easily than ordinary concrete or mortar.
However, the name “self-leveling” can be misleading. The product does not measure the floor, remove high spots, seal gaps, mix itself, or automatically create the correct finished elevation.
The installer must still:
- Survey the floor.
- Mark high and low areas.
- Seal openings.
- Apply the correct primer.
- Measure the mixing water.
- Maintain the required thickness.
- Spread the material.
- Keep a wet edge between batches.
- Protect the surface while it cures.
Therefore, self-leveling compound should be viewed as a flowable underlayment rather than a product that completes the entire job without assistance.
Flat Versus Level: What Does the Floor Need?
A flat floor and a level floor are not the same.
A level floor is horizontal. Meanwhile, a flat floor has no unacceptable short dips, ridges, humps, or waves.
For example, a room may slope gradually from one wall to another while remaining flat. That stable slope may not create a problem for some flooring systems. In contrast, a floor that appears level overall may contain a sharp low spot that allows planks to bend under foot traffic.
Most flooring products place greater importance on flatness than perfect levelness. Therefore, check the finished-floor manufacturer’s installation instructions before trying to raise the entire room.
The National Wood Flooring Association publishes industry-accepted installation guidance that is regularly reviewed by flooring experts. However, the exact flatness limit for a project should still come from the selected flooring manufacturer.
What Problems Can an Uneven Subfloor Cause?
A finished floor depends on the support beneath it. When the substrate contains unsupported dips or abrupt high areas, the flooring may move, crack, separate, or wear unevenly.
Possible problems include:
- Vinyl plank joints separating
- Laminate locking systems breaking
- Hollow sounds beneath floating floors
- Cracked tile or grout
- Poor mortar or adhesive contact
- Carpet wearing unevenly
- Sheet vinyl showing ridges and seams
- Furniture rocking
- Chairs rolling toward low areas
- Cleaning water collecting in depressions
- Difficult movement for carts or wheelchairs
- Unsafe transitions between rooms
Thin and rigid floor coverings usually reveal substrate defects more clearly than thick, flexible materials. Nevertheless, even carpet may show broad dips, sharp transitions, or unstable panel seams.
When Should You Use Floor Leveling Compound?
A floor leveler may be appropriate when the substrate is structurally sound but does not meet the finished-floor manufacturer’s flatness requirement.
Common applications include:
- Filling a stable low area in concrete
- Smoothing rough concrete after flooring removal
- Repairing shallow surface gouges
- Flattening approved plywood assemblies
- Covering prepared tile or terrazzo
- Ramping between different flooring heights
- Smoothing minor panel variations
- Encapsulating an approved radiant-heating system
- Correcting broad but stable floor variations
- Preparing a smooth base for thin vinyl
A full-room pour is not always necessary. When only one or two areas are low, a trowel-applied patch may be faster, less expensive, and easier to control.
When Is Floor Leveling Compound the Wrong Repair?
Do not use the material to conceal an unidentified structural or moisture problem.
Surface patching is not a suitable substitute for repairing:
- Rotten plywood
- Swollen or delaminated panels
- Loose subfloor sheets
- Unsupported panel edges
- Broken joists
- Excessive floor deflection
- Foundation settlement
- Active concrete cracks
- Hydrostatic pressure
- Plumbing leaks
- Persistent dampness
- Loose tile
- Weak concrete
- Major structural height differences
A hardened compound may crack or separate when the material beneath it continues moving. Therefore, investigate soft areas, bouncing, recurring cracks, recent settlement, water stains, and worsening slopes before applying any floor patch.
Types of Floor Leveling Compound
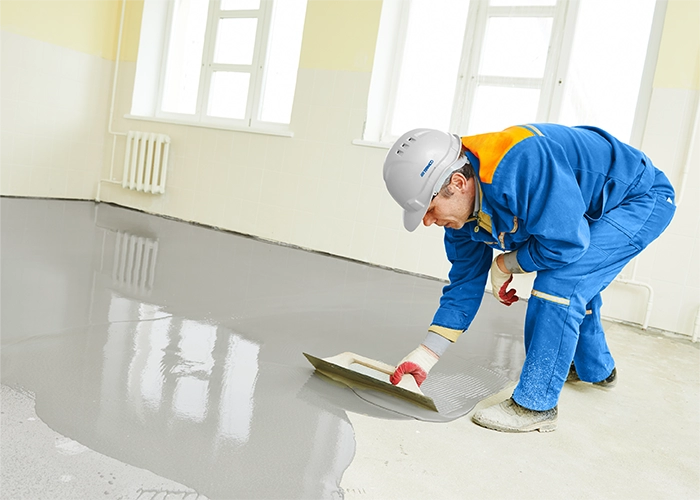
The right product depends on the size, depth, location, and cause of the uneven area.
Self-Leveling Underlayment
Self-leveling underlayment has a fluid consistency and usually suits broad areas with repeated variations. Installers pour or pump it over a prepared and primed substrate, then guide it with suitable tools.
A self-leveler may have a working or flow time of only several minutes. Therefore, large pours often require several people who can continuously mix, transport, place, and spread the material.
Trowel-Applied Floor Patch
A trowel-applied patch has a thicker consistency. It works well for isolated depressions, panel seams, damaged edges, doorways, and small transitions.
Because the material stays where it is placed, the installer has more control over the shape of the repair. However, many patches also set quickly, so only a manageable quantity should be mixed.
Feather-Finish Compound
A feather-finish product can create a very thin, smooth edge around a patch. It is useful beneath vinyl and other materials that may reveal small ridges.
Not every floor patch allows a true feather edge. Therefore, verify the minimum permitted thickness before installation.
Skim-Coating Material
A skim coat covers shallow texture, small scratches, adhesive marks, or minor surface roughness. It is not normally intended to fill a deep low spot.
Deep-Fill Leveler
A deep-fill product allows a thicker application than an ordinary patch. Some manufacturers permit approved aggregate to be mixed into the first layer when deeper correction is needed.
Never add sand, gravel, or another filler unless the manufacturer specifies the material, size, ratio, and application method.
Ramping Compound
Ramping compounds create controlled slopes between different floor elevations. They are useful at doorways, equipment areas, commercial transitions, and accessibility routes.
Gypsum-Based Underlayment
Gypsum products often appear in apartments, multifamily buildings, radiant-heating systems, and sound-rated or fire-rated assemblies. Their preparation, priming, moisture limits, and repair requirements differ from those of cement-based products.
Self-Leveling Topping
A topping is designed to remain exposed or receive a decorative finish. In contrast, most self-leveling underlayments must be covered by finished flooring.
Do not leave an ordinary underlayment exposed unless its manufacturer allows it to function as a wear surface.
Self-Leveling Compound Versus Floor Patch
The following table shows common repair situations. However, the selected product must still approve the specific substrate and depth.
| Floor condition | Likely repair approach |
| Small shallow gouge | Trowel-applied floor patch |
| One localized low spot | Patch or feather-finish product |
| Broad stable unevenness | Self-leveling underlayment |
| Sharp floor transition | Ramping compound |
| Deep stable depression | Approved deep-fill leveler |
| High concrete ridge | Mechanical reduction with dust control |
| Loose plywood | Refasten or replace the panel |
| Swollen panel edge | Correct moisture and repair the panel |
| Structural sag | Inspect and repair framing |
| Active concrete crack | Evaluate movement before patching |
Can Floor Leveling Compound Be Used on Concrete?
Concrete is one of the most common substrates for leveling products. Nevertheless, the slab must be sound, solid, stable, clean, and suitable for the selected system.
Inspect concrete for:
- Cracks
- Moisture
- Oil
- Grease
- Paint
- Sealers
- Curing compounds
- Weak surface material
- Adhesive residue
- Dust
- Contamination
- Hollow or damaged areas
Mechanical preparation may be necessary to remove contaminants and create the required surface profile. Depending on the product, this work may involve grinding, shot blasting, or another approved method.
High spots should often be reduced before low spots are filled. Otherwise, the installer may need to raise the entire floor unnecessarily.
Manufacturer guidance also warns that self-leveling underlayments are not designed to withstand flooding, active leaks, hydrostatic pressure, or uncontrolled excess moisture.
Can It Be Applied Over Plywood?
Some leveling products can be applied over approved plywood assemblies. However, approval for concrete does not automatically mean approval for wood.
Before installation, verify:
- Plywood grade
- Total panel thickness
- Joist spacing
- Number of panel layers
- Panel orientation
- Fastening pattern
- Required primer
- Reinforcement requirements
- Minimum compound depth
- Finished-floor compatibility
- Maximum permitted movement
The plywood must be clean, dry, firmly fastened, and structurally sound. Loose panels should be secured, while rotten or delaminated sections should be replaced.
As one manufacturer-specific example, MAPEI’s surface-preparation guidance requires particular exterior-grade plywood assemblies for its self-leveling systems and states that certain unstable wood products are unsuitable. These requirements apply to that manufacturer’s system and should not be generalized to every product.
Can It Be Used Over OSB?
The answer depends on the exact product.
Some manufacturers approve specific oriented strand board assemblies when compatible primers, reinforcement, panel thicknesses, and preparation methods are used. Other products exclude OSB completely.
Before applying material over OSB, check for:
- Swollen edges
- Loose flakes
- Wax or coatings
- Moisture damage
- Panel movement
- Unsupported seams
- Inadequate thickness
Never assume that every product approved for plywood is also approved for OSB.
Can It Be Used Over Old Tile or Terrazzo?
Certain levelers can be installed over securely bonded ceramic tile, porcelain, quarry tile, natural stone, or terrazzo.
However, the existing surface must be:
- Firmly attached
- Structurally stable
- Clean
- Dry
- Free from wax and grease
- Prepared with the required method
- Compatible with the selected primer
Loose or hollow tile must be removed or repaired. Otherwise, the new compound may fail with the old surface beneath it.
Current manufacturer guidance also shows that approval varies by flooring type. For example, some stable tile surfaces may qualify, while sheet vinyl, laminate, self-stick tile, and other dimensionally unstable finishes may be prohibited.
Can Floor Leveling Compound Cover Adhesive Residue?
Some products permit very thin, firmly bonded residues of specific adhesives. However, other systems require full removal.
Compatibility depends on:
- Adhesive type
- Adhesive thickness
- Bond strength
- Water sensitivity
- Age
- Chemical composition
- Substrate
- Primer
- Finished-floor adhesive
Do not sand, grind, or scrape unknown old flooring materials until asbestos and other hazardous-material concerns have been addressed. Manufacturer guidance specifically warns against disturbing materials that may contain asbestos.
Can It Go Over Painted Concrete?
Paint may prevent the compound from bonding directly to the concrete. Some systems allow particular well-bonded coatings after mechanical preparation, bond testing, and application of a specialty primer.
However, other systems require the coating to be removed completely.
Remember that the new layer is only as secure as the material beneath it. Even a strong leveler can separate if the old paint loses its bond.
Can It Cover Radiant Heating?
Certain leveling products can encapsulate approved electric cables, heating mats, or hydronic systems.
Before installation, confirm:
- Required depth over the heating element
- Maximum permitted compound thickness
- Compatible primer
- Reinforcement requirements
- Temperature limits
- Shutdown period
- Restart procedure
- Waterproofing or crack-isolation requirements
For one current manufacturer system, radiant heat must be turned off before and during installation and should not be restarted until the required waiting period has passed. Because requirements vary, follow both the heating-system instructions and the leveler’s current data sheet.
How to Measure an Uneven Subfloor
Do not judge floor flatness only by looking at the surface.
Useful inspection tools include:
- Long straightedge
- Laser level
- String line
- Tape measure
- Taper gauge
- Feeler gauge
- Chalk
- Marker
- Floor plan
Begin by cleaning the floor so debris does not lift the straightedge. Next, place the straightedge in several directions across the room. Rotate it and check near walls, doorways, seams, transitions, and traffic routes.
Measure the largest gap beneath the straightedge and mark it on the floor. Also locate the highest points. Sometimes one raised seam or concrete ridge causes the surrounding floor to appear low.
After mapping the room, compare your measurements with the finished-floor manufacturer’s flatness limit. Do not calculate material from the deepest point alone because the average fill depth may be much smaller.
Tools and Materials You May Need
The equipment depends on the product and project size. A typical installation may require:
- Measuring tools
- Clean mixing buckets
- Heavy-duty drill
- Manufacturer-approved paddle
- Measuring container
- Flat steel trowel
- Gauge rake
- Smoothing tool
- Spiked roller when required
- Spiked shoes when appropriate
- Primer roller or brush
- High-efficiency shop vacuum
- Edge barriers
- Approved sealant or foam
- Mixing timer
- Gloves
- Eye protection
- Protective clothing
- Suitable respiratory protection
Large jobs may also require a pump, several mixing stations, extra workers, and a planned route for transporting material.
How to Prepare a Subfloor for Floor Leveling Compound
Preparation is often the most important part of the installation. Applying excellent material over a weak, dirty, or moving substrate can still produce a failure.
1. Identify the Cause
Determine whether the low area comes from harmless surface variation, framing movement, damaged panels, concrete settlement, moisture, or swelling.
Do not continue until serious structural or moisture problems have been corrected.
2. Remove Loose Materials
Remove flooring, underlayment, tack strips, loose adhesive, weak concrete, paint, dust, and other bond-breaking materials as required.
3. Repair the Substrate
Secure loose wood panels and replace damaged sections. Repair unsupported edges correctly. On concrete, assess cracks and damaged areas before covering them.
4. Reduce High Spots
Removing a high spot may use less material than raising the surrounding floor.
High concrete can require mechanical grinding. Meanwhile, swollen or raised plywood seams require investigation because sanding alone may not solve moisture or movement.
5. Clean Thoroughly
Vacuum the floor instead of relying only on a broom. Fine dust can remain on the surface and interfere with adhesion.
The substrate should be free from dirt, oil, grease, wax, soap, paint, sealers, loose coatings, curing compounds, and incompatible adhesive residue.
6. Seal Leaks and Openings
Fluid material can escape through small gaps.
Seal openings around:
- Pipes
- Vents
- Wall edges
- Doorways
- Panel seams
- Floor penetrations
- Stair openings
- Heating ducts
Use suitable barriers that will not interfere with required movement or perimeter joints.
7. Address Moisture
Find and repair active leaks before installation. Check moisture conditions when required by the leveler, adhesive, moisture-control system, or finished flooring.
A surface that looks dry can still contain or transmit problematic moisture.
8. Apply the Correct Primer
Most self-leveling systems require a compatible primer. Primer improves bonding, controls absorption, and may reduce pinholes.
Porous concrete may pull water from the material too quickly, while a nonporous surface may provide little grip. Therefore, different substrates may require different primers.
Never replace the specified primer with a generic product unless the manufacturer approves the substitution.
Why Floor Primer Matters
Primer is not simply optional paint placed beneath the leveler.
It may:
- Improve adhesion
- Control substrate porosity
- Reduce trapped air
- Limit pinholes
- Improve flow
- Prevent rapid moisture loss
- Create a bond to nonporous surfaces
However, incorrect application can also create problems. Avoid puddles, missed areas, contamination, or installation outside the primer’s permitted drying window.
Manufacturer preparation guidance commonly requires both a properly prepared substrate and a compatible primer before self-leveling material is poured.
How to Mix Floor Leveling Compound
The exact mixing method must come from the product’s technical data sheet.
A reliable process generally includes the following steps:
- Use clean containers and tools.
- Measure the water or approved liquid accurately.
- Add the liquid and powder in the required order.
- Mix with the recommended paddle.
- Stay within the stated drill speed.
- Mix for the required duration.
- Observe any required waiting or remix period.
- Avoid trapping too much air.
- Use the material before its working time expires.
Do not estimate the water based on appearance. Too much water may reduce strength, increase shrinkage, delay drying, or cause separation. Too little water may reduce flow and leave ridges.
What Is Retempering?
Retempering means adding more water after the compound has started setting.
Although the mixture may briefly become easier to spread, the chemical curing process has already begun. Additional water can weaken the repair and create a dusty, soft, cracked, or inconsistent surface.
Discard material that has exceeded its working time. Do not try to revive it.
How to Apply a Trowel-Applied Patch
Begin at the deepest part of the depression. Press the material firmly against the primed substrate, then pull it toward the surrounding floor with a flat trowel.
Keep the repair within the product’s approved thickness range. Feather the edge only when the manufacturer permits it.
Avoid leaving sharp trowel ridges, particularly beneath sheet vinyl, glue-down vinyl, and other thin finishes.
When a low spot is deeper than one permitted coat, follow the manufacturer’s instructions for multiple layers. The first layer may need to dry and receive another primer.
How to Pour Self-Leveling Compound
Plan the complete pour before mixing the first bag.
Decide:
- Where mixing will take place
- Where the first pour will begin
- How each batch will reach the room
- How the wet edge will be maintained
- Where workers will exit
- How doorways will be blocked
- How much material will be mixed at one time
Then follow this general sequence:
- Confirm that the substrate is ready.
- Make sure all openings are sealed.
- Verify that the primer has reached the correct condition.
- Mark the required pour depth.
- Mix the first batch accurately.
- Pour in a controlled ribbon.
- Guide the material with approved tools.
- Add the next batch while the previous one remains workable.
- Avoid excessive surface disturbance.
- Protect the material from traffic, drafts, and contamination.
As one product-specific example, MAPEI Self-Leveler Plus has a listed flow time of about 10 minutes under stated conditions. Temperature and humidity can change working time, so large installations require careful planning.
How Thick Can Floor Leveling Compound Be?
There is no universal maximum thickness.
Some patches can be applied to a feather edge. Others require a minimum depth. A self-leveling material may permit a deeper single pour, while another product may require multiple layers or aggregate extension.
For example, one current MAPEI product allows an application from 1/8 inch to 1 inch in a single pour. That range applies only to that exact product and should never be used as a general rule for every floor leveler.
Installing material beyond its permitted thickness may cause:
- Slow curing
- Shrinkage
- Cracking
- Weak areas
- Trapped moisture
- Excessive heat
- Poor surface quality
- Unexpected finished-floor height
Use an approved deep-fill system when the correction exceeds an ordinary product’s limit.
Can the Material Be Feathered to Zero?
Only products designed for feather-edge application should be tapered to an extremely thin edge.
Many self-leveling underlayments have a minimum thickness. In those cases, a compatible finishing patch may be needed around the edge.
Check whether the two materials can be used together and whether another primer is required between layers.
How Long Does Floor Leveling Compound Take to Dry?
Drying and curing time depend on:
- Product formulation
- Layer thickness
- Temperature
- Humidity
- Air movement
- Substrate absorption
- Water ratio
- Primer
- Moisture conditions
- Finished-floor type
A surface may become hard enough for foot traffic before it is ready for adhesive or moisture-sensitive flooring.
Product data sheets may list several different times, including:
- Initial set
- Final set
- Walkable time
- Tile installation time
- Resilient-flooring installation time
- Wood-flooring installation time
- Full cure
For example, one current product allows ceramic tile or stone after 24 hours but requires two to three days before other floor coverings. Again, those times apply only to that product under its stated conditions.
Can Fans or Heaters Speed Up Drying?
Strong airflow, high heat, or direct sunlight may cause uneven drying. They may also shorten the working time while the material is being placed.
Follow the product’s temperature, humidity, ventilation, and draft requirements. Do not place a powerful fan directly across freshly poured material unless the manufacturer permits it.
How to Calculate Floor Leveling Compound Coverage
Use the coverage chart for the exact product.
The basic formula is:
Repair area ÷ stated bag coverage at the average depth = bags required
Suppose one bag covers 24 square feet at an average depth of 1/4 inch, and the repair area is 200 square feet:
200 ÷ 24 = 8.33 bags
Round up to nine bags. Then add a reasonable allowance for waste, mixing residue, unexpected depth, and floor variation.
Do not calculate the whole room using the deepest measurement. Map the floor and estimate the average fill depth instead.
For a large pour, keep enough material on site to complete the wet area without interruption. Running out during installation can create ridges and cold joints.
Using Floor Leveling Compound Under Vinyl and LVP
Vinyl can reveal even small substrate imperfections.
Sheet vinyl may telegraph:
- Panel seams
- Trowel marks
- Patch edges
- Adhesive ridges
- Fasteners
- Rough concrete
Floating luxury vinyl plank also requires continuous support. A low area may let the boards flex, stress the locking joints, create clicking sounds, or cause separation.
Therefore, smooth the repair carefully and confirm that the surface meets the vinyl manufacturer’s flatness requirement.
Preparing a Subfloor for Laminate
Laminate underlayment provides functions such as sound reduction, vapor management, and minor cushioning. It is not designed to correct major dips.
Using extra-thick foam or several layers of underlayment may create too much movement beneath the planks. Consequently, the locking system may loosen or break.
Correct the substrate first, then use only the underlayment approved for the laminate product.
Requirements Beneath Tile and Stone
Tile and stone need a flat, rigid, stable base.
Low areas can reduce mortar coverage and create unsupported tile sections. Meanwhile, excessive movement may crack grout or tile even when the surface looks smooth.
Large-format tile usually makes subfloor variations more noticeable. However, a leveling compound cannot correct excessive framing deflection. The complete floor assembly must support the tile system.
Requirements Beneath Carpet
Carpet can hide small amounts of surface texture, but it may not conceal broad depressions, sharp ridges, loose panels, or unstable transitions.
Patch abrupt defects before installing carpet and pad. Otherwise, traffic patterns and rolling furniture may make the unevenness more visible.
Using Floor Patch Under Hardwood
The correct repair depends on whether the hardwood will be glued, floated, or nailed.
For glue-down wood flooring, the patch must work with the wood-floor adhesive and any moisture-control system.
For floating engineered wood, the substrate must provide continuous support.
For nail-down hardwood, fasteners must still reach the required depth in sound structural wood.
Can You Nail Through Floor Leveling Compound?
Do not assume that a cement-based patch is nailable because it is approved over plywood.
A hardwood cleat may chip or crack a brittle patch. More importantly, the fastener must still penetrate enough solid wood to secure the flooring.
Before installing nail-down hardwood over patched areas, confirm:
- The patch is approved for the plywood assembly.
- The flooring manufacturer allows the repair.
- Fasteners will reach sufficient structural wood.
- The compound will not interfere with fastening.
- Longer fasteners are allowed if needed.
- Hidden pipes and wires remain protected.
- The patched area remains stable.
Older forum discussions sometimes describe particular compounds as nailable. However, historical jobsite advice is not equal to current written manufacturer approval.
Should Roofing Felt or Shingles Be Used to Fill Low Spots?
Some installers have historically built up shallow areas beneath nail-down hardwood with roofing felt or asphalt shingles.
However, this method may affect:
- Compression
- Fastener penetration
- Floor movement
- Odor
- Vapor behavior
- Fire-rated assemblies
- Acoustic systems
- Flooring warranties
Therefore, do not use an improvised buildup unless the hardwood manufacturer and project specifications permit it.
Can Drywall Joint Compound Be Used on a Subfloor?
Drywall joint compound is not a dependable substitute for an approved floor patch.
It is designed for walls and ceilings rather than concentrated floor loads. It may not provide sufficient:
- Compressive strength
- Moisture resistance
- Bond strength
- Durability
- Flooring compatibility
Even when the defect appears small, use a compound designed and approved for floor preparation.
Can Thin Plywood Level an Uneven Floor?
A plywood overlay may improve some stable subfloor conditions. However, thin plywood usually follows broad waves rather than correcting them.
It may also:
- Raise doorway elevations
- Complicate transitions
- Reduce fastener penetration
- Add another layer that can move
- Hide rather than solve moisture damage
A 1/4-inch sheet should not be described as a structural repair. Panel type, thickness, orientation, seam placement, and fastening must match the planned flooring assembly.
Is Floor Leveling Compound Waterproof?
Most interior levelers are not waterproofing membranes.
A cured cement-based product may tolerate ordinary construction moisture without preventing:
- Vapor transmission
- Hydrostatic pressure
- Plumbing leaks
- Flooding
- Standing water
Bathrooms, showers, wet rooms, and similar locations may need a separate approved waterproofing system.
Can It Be Used in a Bathroom?
Yes, when the product is approved for the substrate and bathroom assembly.
However, ordinary leveling compound does not replace required waterproofing in showers or other wet areas. Repair plumbing leaks and damaged wood before applying the compound.
Can It Be Used in a Basement?
Basement slabs require careful moisture assessment.
Possible concerns include:
- Ground moisture
- Vapor emissions
- Hydrostatic pressure
- Cracks
- Previous coatings
- Efflorescence
- Drainage problems
A compatible moisture-mitigation system may be necessary before the leveler, adhesive, and finished flooring are installed.
Is Floor Leveling Compound Safe?
Dry cement-based material can irritate the eyes, skin, nose, and lungs. Wet cementitious material can also irritate or burn skin.
In addition, some products contain crystalline silica. Pouring powder, dry sweeping, sanding, cutting, or grinding silica-containing material may release respirable dust.
OSHA requires covered construction employers to control worker exposure to respirable crystalline silica and restrict dust-producing housekeeping methods where safer alternatives are available.
Safe practices may include:
- Reading the current Safety Data Sheet
- Controlling airborne dust
- Using suitable ventilation
- Using dust extraction
- Avoiding dry sweeping
- Wearing gloves
- Wearing eye protection
- Protecting exposed skin
- Using correctly selected respiratory protection when required
- Keeping other people away from dusty work
- Cleaning tools while the material is fresh
Do not rely on old forum comments that minimize silica or cement exposure.
Common Floor Leveling Compound Mistakes
Skipping the Floor Inspection
Pouring compound before checking for movement, moisture, or structural damage may hide the real problem.
Confusing Flat With Level
Trying to make the entire room perfectly horizontal can require far more material than necessary.
Choosing the Wrong Product
A concrete-only product may fail over plywood. Likewise, an interior underlayment may fail outside or in a continuously wet location.
Skipping Primer
The compound may lose flow, develop pinholes, or separate from the substrate.
Applying Over Dust
Fine dust can prevent adhesion even when the floor appears clean.
Adding Too Much Water
Extra water may improve flow temporarily while reducing strength and increasing shrinkage.
Mixing Too Much Material
A fast-setting batch may harden before it can be placed.
Losing the Wet Edge
A delay between batches can create a ridge or visible joint.
Failing to Seal Openings
Liquid compound may run into ducts, wall cavities, or the room below.
Exceeding the Thickness Limit
A thicker application may dry slowly, crack, or remain weak.
Covering the Material Too Soon
A walkable surface may still hold too much moisture for adhesive or flooring.
Hiding Structural Problems
Leveling compound cannot repair broken framing, rotten panels, or foundation settlement.
Troubleshooting Common Failures
The Material Did Not Flow
Possible causes include insufficient water, incorrect primer, an absorbent substrate, warm conditions, delayed placement, or use of a patching product instead of a self-leveler.
Pinholes Appeared
The substrate may have released trapped air. Poor primer coverage or excessive air introduced during mixing may also be responsible.
The Surface Cracked
Possible causes include:
- Substrate movement
- Excessive application depth
- Too much water
- Rapid drying
- Missing reinforcement
- Active cracks
- Incorrect temperature
The Compound Separated
Dust, grease, moisture, incompatible coatings, wrong primer, or a weak underlying surface may have prevented a secure bond.
Ridges Formed Between Batches
The installer may have waited too long and lost the wet edge.
The Surface Is Soft or Powdery
Possible reasons include excess mixing water, contamination, poor curing conditions, expired material, or incorrect mixing.
Do not cover a failed patch with flooring. Identify the cause and repair the substrate first.
How Much Does Floor Leveling Compound Cost?
The total project cost depends on:
- Floor area
- Average fill depth
- Coverage per bag
- Product type
- Primer
- Preparation
- Grinding
- Crack repair
- Panel replacement
- Moisture mitigation
- Labor
- Equipment
- Finished-floor height changes
- Disposal
- Access to the work area
A small trowel repair may use only part of a bag. In contrast, a full-room pour may require many bags, several workers, mixing equipment, barriers, primer, and careful planning.
Correct preparation may seem expensive, but it can prevent cracked tile, failed adhesive, separated planks, and early flooring replacement.
DIY or Professional Installation?
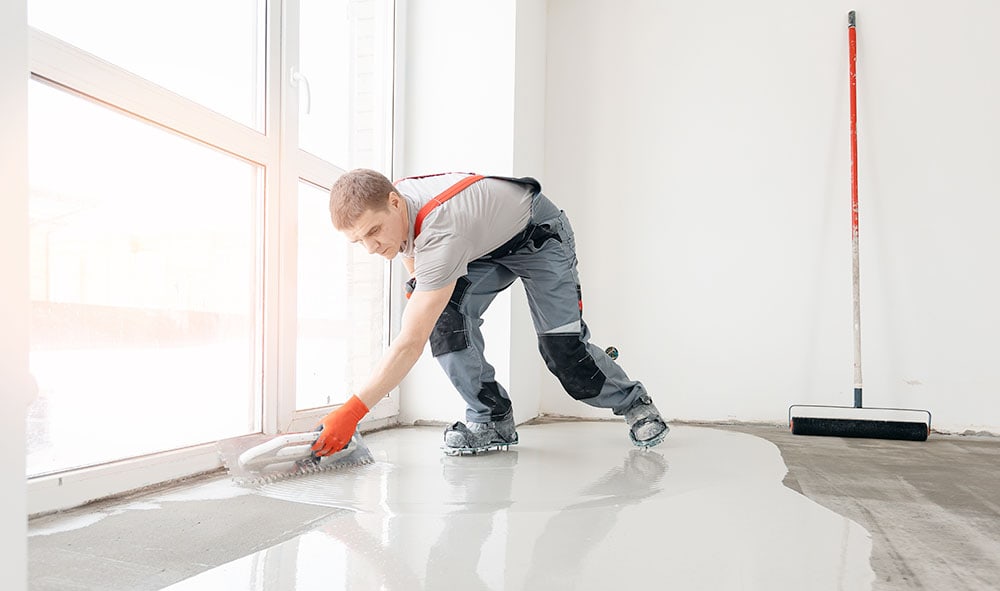
A small localized patch may be manageable for a careful homeowner who can assess the substrate and follow the product instructions.
Professional installation is more appropriate when:
- The entire room needs leveling.
- The depth changes significantly.
- The substrate is plywood or OSB.
- Moisture is present.
- Radiant heating must be covered.
- The room contains many openings.
- The material has a very short working time.
- A decorative exposed finish is planned.
- Structural movement is suspected.
- The installation is commercial.
- The flooring warranty requires professional preparation.
Large pours can fail quickly. Therefore, a professional crew may save money when the alternative is removing a hardened, unsuccessful installation.
Floor Leveling Compound Checklist
Before purchasing material, confirm:
- Finished-floor flatness requirements
- Substrate type
- Cause of unevenness
- Moisture conditions
- Product compatibility
- Primer requirements
- Reinforcement requirements
- Minimum and maximum thickness
- Coverage per bag
- Mixing ratio
- Pot life
- Installation temperature
- Drying time
- Flooring compatibility
- Adhesive compatibility
- Safety requirements
- Finished-floor height
- Door and transition clearance
Before mixing, confirm:
- The floor is structurally sound.
- All contamination has been removed.
- High areas have been addressed.
- Cracks have been evaluated.
- Openings have been sealed.
- Primer is ready.
- Enough material is on site.
- Water is accurately measured.
- Tools are clean.
- The exit route is clear.
- Helpers understand the sequence.
Frequently Asked Questions About Floor Leveling Compound
Floor leveling compound fills stable low spots, smooths rough substrates, creates gradual transitions, and prepares a flat base before finished flooring is installed.
People often use the terms interchangeably. However, most flooring levelers are specialized underlayments rather than ordinary structural concrete.
It flows more easily than mortar, but the installer must still measure, mix, pour, spread, contain, and protect it correctly.
Yes, when the exact product approves the plywood assembly and all primer, thickness, reinforcement, and fastening requirements are followed.
Some systems allow specific OSB installations, while others prohibit them. Check the current technical data sheet.
It can change elevation, but correcting a major slope may require excessive material and may conceal a structural problem. A floor often needs to be flat rather than perfectly level.
The allowable thickness varies by product. Some patches feather to a thin edge, while certain self-levelers permit much deeper applications.
Many products permit additional layers. However, the first layer may need to dry and receive another primer before the second pour.
The waiting period may range from several hours to several days. It depends on the product, thickness, temperature, humidity, and flooring type.
It can crack when the substrate moves, the product is overwatered, the layer is too thick, preparation is poor, or drying occurs too quickly.
Most self-leveling systems require primer. Never omit it unless the current technical data sheet expressly allows installation without it.
Do not exceed the stated water ratio. Extra water can reduce strength and cause shrinkage, separation, or slow curing.
Some products permit limited surface finishing after curing. However, sanding and grinding may create hazardous dust, so use approved controls and avoid unnecessary abrasion.
Usually not. Most products do not replace waterproofing or moisture-mitigation systems.
Most underlayments must be covered. Only products specifically designed as toppings or wear surfaces should remain exposed.
Drywall mud is not a reliable floor patch because it may lack the necessary strength, moisture resistance, and flooring compatibility.
Do not assume so. Confirm the method with both the patch manufacturer and the hardwood manufacturer, and ensure fasteners reach sufficient structural wood.
No. Foam may cushion minor texture, but it cannot correct a subfloor that falls outside the flooring manufacturer’s flatness requirement.
Final Thoughts
Floor leveling compound can create the smooth, stable base needed for long-lasting vinyl, laminate, tile, carpet, and wood flooring. However, the quality of the result depends on diagnosis and preparation more than the act of pouring.
First, determine whether the floor has a stable surface variation or an underlying structural problem. Next, measure the complete room and compare it with the finished-floor manufacturer’s flatness requirement. Then select a compound approved for the substrate, application depth, moisture condition, and flooring system.
Finally, clean and repair the substrate, seal openings, apply the correct primer, measure the mixing water, maintain the wet edge, and respect the full drying time.
When these steps are followed, floor leveling compound can provide reliable support for a durable and attractive finished floor.